The Amazing Kneeland Methodology Kneeland Methodology Jo Anna Kneeland Editing and encoding Myrna Layton 2026 Scholarly Editing: The Annual of the Association for Documentary Editing http://www.scholarlyediting.org Association for Documentary Editing 2026 se-microedition-kneeland 10.55520/9XQAPZHS Scholarly Editing: The Annual of the Association for Documentary Editing is freely distributed by the Association for Documentary Editing and licensed under a Creative Commons Attribution-NonCommercial-ShareAlike 4.0 International License. Scholarly Editing: The Annual of the Association for Documentary Editing Editor in Chief Noelle Baker Managing Editor Robert Riter Technical Editor Co-Micro-editions Editor Raffaele Viglianti Co-Micro-editions Editor Megan Bushneel 43 2167-1257 United States Brigham Young University Library Jo Anna Kneeland's ballet teaching methodology, comprising her introduction ("Pink Clouds"), the main text ("The Amazing Kneeland Methodology"), and a glossary ("Kinetic Vocabulary"). This edition is based on computer files (in Microsoft Word and PDF formats) retyped by Mary Price Boday in the early 2000s from a manuscript handwritten or dictated by Jo Anna Kneeland and typed by her colleague Derva Snider during the 1980s. None of the original physical sources are known to be extant. A historical, documentary approach has been taken, preserving the methodology as evidence of Jo Anna Kneeland's pioneering work. Kneeland's use of bold typeface, underlining, and italics for emphasis has been retained. Editorial corrections of apparent typing errors are supplied in square brackets and shown by default; the original readings, together with editorial deletions, can be revealed through the edition's display options. Missing accent symbols for French ballet terminology have been supplied where possible. Explanatory notes are provided as editorial annotations, and terms defined in Kneeland's "Kinetic Vocabulary" glossary are linked throughout. English Written over Kneeland's career, 1980s–1990s

THE AMAZING KNEELAND METHODOLOGY

INTRODUCTION“PINK CLOUDS”

When deciding to take up the study of dance, it is important that all students recognize the three main categories of concern. The first is physical appearance or what might be called the building of the instrument and what must be done to train their particular body. The second is the what to do or the technical study required – mastering the steps, vocabulary and repertoire. The third is the “how to do” or the kinesiology of the art form. It is one thing to know what to do and what it should look like, but it is another thing to know “how to do it” and just what the body must do to accomplish it. The first category is sometimes a long and laborious one if one is not physically endowed by nature with the necessary requirements for a dancer. Since these requirements vary considerably from idiom to idiom and from dancer to dancer, it would be an impossible task to attempt an in-depth analysis of each variable so I will concern myself with classical ballet because that was the idiom through which I was trained and for which my ten-year study was conducted. However, it should be pointed out that all the kinetic principles contained in the discourse Text supplied by the editor. apply End of supplied text. any time the body is in motion and not just to classical ballet. Nonetheless, if one can meet the rigorous standards required of the classical dancer, then it is a simple matter to meet the standards of any other dance form, gymnastics, ice skatingEditorial correction. , End of Editorial correction. or athletic activity. For aesthetic reasons, the physical requirements for the ballet dancer are stringent – a lithe, well-formed physique with a short torso, long legs and a highly-arched foot. The back must be limber or show the potential for being limber to assure beautiful lines and form for arabesques and attitudes and the rotation in the hip joint must be enough to permit acceptable turnout or development of turnout and leg extension. Unfortunately, many potentially wonderful dancers do not pursue their dreams of artistic achievement and a career in dance simply because someone thoughtlessly pointed out to them certain physical flaws or they have been told or come to believe that they do not possess the “perfect body”. The rigorous requirements of classical ballet demand a perfection of which no single human being is capable of achieving and if we accepted the so-called perfect body criteria verbatim, we would have no dancers. For example, extremely flexible bodies generally lack muscular stability, skeletal strengthEditorial correction. , End of Editorial correction. and physical stamina. A narrow pelvis encourages locative abilities but precludes turnout and leg extension. Compact muscle groups have tremendous rebounding qualities for jumping but lack the lyrical qualities of the long, slender muscle structure. The highly-arched foot is beautiful but weak and vice versa. Indeed, it is the rare dancer that has strength, coordination, flexibility, mobility and agility in all the muscle groupsEditorial correction. , End of Editorial correction. and the body definition and proportions that exemplify the ideal dancer. Therefore, to lament the lack of a perfect body while continuing to strive for the physically impossible at the risk of injury is an exercise in futility, frustration and needless pain. No teacher is God and those who attempt to play the role can do irreparable damage. The wise teacher will not only emphasize the correct technique (the “how to“ category of training) but will encourage the students to focus energy on their positive qualities while working out effective ways of dealing with those defects which can’t be changed. For example, Ted Kivitt, formerly Premier Danseur of American Ballet Theatre, was told early on by his teacher that he would never become a dancer of first rank because he had “bowed-legs” and “pigeon-toes”. Heartbroken, he was ready to give up the study of dance, when he heard about my experiments using kinesiology to overcome the physical problems of students who had been designated by other teachers as “untrainable”. After hearing his problem, I agreed to help him and invited him to join my “control group.” The rest is history. With the use of the proper kinesiology, good technical trainingEditorial correction. , End of Editorial correction. and his own determination, Ted Kivitt became so dynamic and commanding on stage that I doubt that anyone ever noticed his legs or his feet. Although I did not train her, Margot Fonteyn, one of the most beautiful ballerinas of all time, has a similar story to tell. By her own admission, she had a low extension, an imperfect arch, a short neck, a low hairlineEditorial correction. , End of Editorial correction. and non-classic features. During early training, no one believed that she could be anything but a corps dancer. However, because she diligently worked to perfect that technique which fit her body structure and developed her natural theatrical qualities, Margot Fonteyn was able to perform so beautifully on stage that I doubt that anyone ever noticed her defects either or if they did, no one cared. Dancers are not born or fall from little “pink clouds” in a shower of fairy dust, they are trained. Both these individuals had physical limitations, but through their own determination, the proper technical trainingEditorial correction. , End of Editorial correction. and the application of kinesiology to the art form, their defects were minimized and their attributes were maximized, all of which is indicative that the three categories of dance training are amalgamable and of equal importance. Dancers can be re-trained, but I have long maintained that the most important lessons that will ever be learned in the life of a potential dance Editorial correction. dancer End of Editorial correction. occur at the beginning level of training. If properly done, the teacher will have prepared the dancer with all the basic necessities to excel. This could be likened to designing the foundation of a house onto which many stories can be added. If the foundation is broad, strong and constructed from only the finest of materials, then it can hold anything that might be built onto it at a later date. If it is faulty, the strain will eventually become too much and the structure will collapse. The same is true in the training of a dancer. Therefore, no matter how young the student is or how late a student begins training, anyone attempting to master the artistic endeavor of dance should know exactly how the body should use its energies according to the physical laws concerning motion. To move “naturally” achieves excellence and avoids injury. Moreover, since old ideas die hard and the body resists change, it is imperative that the concerned teacher make every effort to present material which will be as valid on day two- thousand as it was on day one. I am talking about material which will aid rather than inhibit progress, material which will develop coordination rather than incoordination, material which will not have to be unlearned somewhere down the road. Unfortunately, there are still many teachers and students who want to categorize dance under the heading of “miracles and magical happenings” and who feel that the physical laws of kinesiology have no place in the art of dance. What a shame! Could they but realize that if they started from day one to apply kinetic movements, principlesEditorial correction. , End of Editorial correction. and concepts which are a part of their everyday lives to their dance art, they would not only succeed in their goals much sooner with lasting and gratifying results, but they would find that the “unnatural” art had become “natural.” The science of kinesiology is adaptable. The same concepts that improve the dance arts can also be applied to any physical activity. For example, some years ago a young athlete named Bob Text supplied by the editor. Dick End of supplied text. Fosbury became dissatisfied with the method used to perform the “high jump.” In those days, it was a common practice to run to the parallel bar, turn the body obliquely and scissor the legs over first, letting the torso and head follow. It occurred to him that since the combination of the torso and head constituted the heaviest part of the body, this practice was counterproductive. He reasoned that the jump could be greatly improved by throwing the heavy parts of the body up and over the bar when the speed, momentum, thrust, torqueEditorial correction. , End of Editorial correction. and split-second timing were at the optimal level and let the lighter parts of the body follow along the waning energy. History has proved his theory. This was precisely the proper kinesiology, the superior kinesiology because Bob Text supplied by the editor. Dick End of supplied text. Fosbury was unbeatable. Eventually everyone had to come around to his way of thinking or loseEditorial correction. , End of Editorial correction. and today there is only one approach to the “high jump” – the Fosbury Flop. Over the years, more and more physical endeavors have embraced kinesiology. In the early sixties, I taught a group of gymnasts to apply kinesiology to their acrobatic moves and their dance routines which enabled several of them to qualify for the 1964 Olympic team. Now kinesiological principles are becoming an integral part of gymnastic training, swimming, and ice skating. I believe this adequately proves what I have been saying. Regardless of the objectives or the physical activity involved, if one has used the body correctly with the proper use of kinetic principles and energies, one will be a winner or champion. Injuries can be avoided because the body in motion is being coordinated in the best possible way. Furthermore, the earlier these scientific principles are accepted and applied, the easier the training process becomes and the greater the results. The following pages are dedicated to the “semantics” of kinesiology as applied to the dance arts because without an understanding of the words with which we deal, the execution of the idiom becomes difficult if not impossible and the true value of the art form is lost through misunderstanding, misinterpretation and change. Although this discourse was designed primarily to introduce dance teachers and students to the tools by which they can better understand the motivating forces and energies required for excellence in dance performance, it is in no way meant to discredit any syllabus or method of teaching – only open the way for improvement. Jo Anna Kneeland

….THE BEGINNING OF KINETIC TRAINING….

UNDERSTANDING SEMANTICS AND INTANGIBLE FEELINGS

One of the first concerns in the training of a dancer is posture. Proper posture of the body is essential if a dancer is to excel and endure. However, we first must deal with the semantics with which we grew up and which fills so many books on classical ballet training. Much of the language is ambiguous or in error, and it has caused many dancers to work their bodies incorrectly with the improper use of energy which can generate potential injury, build bulky musculature and achieve less than the desired results. Therefore, certain words in the technical vocabulary must be eliminated because of their implied and dangerous connotations before we can proceed. In dealing with posture, the first words which we wish to eliminate and should never use again are “pull-up”, “tuck-under, and “tighten” the buttocks, stomachEditorial correction. , End of Editorial correction. or some other muscle group. Granted, each one of these words signifies the “look” which we wish to achieve, but we must hunt for benign substitutes. We definitely want to appear pulled-up, we want to appear to have the pelvis tucked-under the ribs, and we want to appear that our stomachs and buttocks are tightened, but we will get these results in a different way – the proper way – through the use of downward energy and weight level.

DOWNWARD ENERGY AND WEIGHT LEVEL

All students need to understand that there is a downward energy within their bodies which flows in the same line as the flow of gravity and that they must “tune into” this energy with the thought of pushing it through the floor as if they wished to literally push themselves tall. When there is maximum pressure against the floor and the downward energy reaches its saturation point, it will reverse itself and travel back up through the body, lengthening and stretching the mass upwards. Without any conscious thought or effort on their part, the students will feel the chest lifting, the stomach muscles pulling inEditorial correction. , End of Editorial correction. and the buttocks tightening. When we deal with “intangible feelings” and “kinetic awareness,” however, it is often difficult to verbalize and/or communicate exactly what we mean so it may be necessary to present a variety of explanations and visual images to get the point across. For the very young students, we might tell them that if they push down very hard, they will find a wonderful “magic force” which will make their tummies and their buttocks pull right into place while they don’t have to do a thing except push tall. Of course, the word “magic” is quite intriguing to the little onesEditorial correction. , End of Editorial correction. so they generally jump right into the game, never realizing that they are learning a fantastic law of physics. They just think they are having a wonderful time trying to discover a magic force. On the other hand, the older students seem to respond to a more scientific approach. We might encourage them to practice pushing tall several times and then “quiz” them as to whether they subjectively felt the saturation point and the return of the energy upwards through the body. Actually, it is immaterial just how this is accomplished, but it is imperative that the students understand that the feeling of pushing downward energy can only be done if they start from a “high place.” In other words, both feet are on the floor, but the body weight is a fraction above the floor and not fully upon the feet even though the heels are not actually lifted. A good exercise is to have the students practice lifting the heels about 1/16th of an inch off the floor and then go up and down repeatedly to see if they can “feel” the body weight lifting while visualizing the heels as being on the floor. I would like to make it clear that this is not something that can be seen by the naked eye but a “feeling” which must be developed by and felt by the students themselves. Another important point that the students should understand is that they don’t have to bend the knees to be low. If in a standing position the body weight is fully upon the feet, then the student is already working from a place this Editorial correction. that End of Editorial correction. is too low and any effort expended from this position is “counterproductive.” Remember, one can’t push down if one is already down! One has to develop the feeling of being higher than the lowest place and only then can one “push down” and make all these wonderful things happen that we have been talking about.

THE “NEUTRAL STATE” OF THE BODY

In dealing with the important concepts of downward energy and weight level, we are now working towards the first overall package of the “state of neutral.” You will notice that I said neutral is a state of the body and not a position. This is a term that I have devised to describe the state in which the body should be when a dancer prepares to execute any movement – alert, aware, anticipating and ready to go! The three A’s or the neutral state of readiness could very well be compared to a car in which the ignition has been turned on, the engine is runningEditorial correction. , End of Editorial correction. and it is ready to move in any direction when the gears are shifted. If the neutral state of readiness is lacking in the postural stance, the student has already developed feelings which inhibit movement such as pull-up, tuck-under and tighten. We don’t want students pulling up because it takes them out of the neutral state and creates a separation or a cessation of energy in the middle of the body. It also causes the mind to visualize the top part of the torso as “pulling away” from the bottom part. It should be obvious that if the students are allowed to pull-up and isolate their body parts, then they cannot possibly be pushing downward energy – one action defeats the other. Remember, we only want the “appearance” of being pulled-up when in actuality what the students feel is downward thrust. Moreover, we don’t want the students tucking-under in order to get the pelvis under the rib cage. We do want them to have the pelvis under the ribs, pushing or standing naturally tall, the pectoral area of the chest high and a feeling of the upper back being “pulled down” by the downward energy, but this posture can’t be achieved by tucking under. Just like the “pull-up,” the “tuck under” creates an isolation which takes the body out of the state of neutral and causes a forward over-thrusting of the pelvis that also involves the thighs. Additionally, it takes away from the high pectoral posture and the use of the abdominal thrust. Be aware, however, that even though we don’t want the students to “tuck-under,” neither do we want them to over-compensate so that they stand sway-backed with protruding derrieres. Once again, then, we must rely upon that intangible feeling of pushing downward energy. The students must learn to “feel” the pelvis and buttocks are under the rib cage simply by “tuning into” that downward energy and thrust. Then they will discover that they got into that position quite naturally with no effort and without “placing” the body parts. If the students have difficulty in understanding or feeling what is required of them, a good exercise is to have them stick one body part out of alignment at a time and then pull it back into place before proceeding to the next (e.g., shoulders, chest, stomach, buttocks, etc.). After a few moments of this, the teacher may be convinced that the whole class is composed of “silly- putty” or contortionists practicing for an audition. However, this simple exercise seems to give the students an awareness of body-part location both within themselves and in space as well as where they should be. For the last of the postural don’ts, we don’t want students tightening the stomach or buttocks muscles because any clamping, gripping, clenching or forms of “tenseness” results in isolation of that part of the body and destroys the neutral state, proper posture and the ability to move freely. To avoid misunderstanding, it should be made clear that we do want “tension” or a stretched and continuous energy throughout the body, but we all know what happens to our muscles and body functions when we suffer stage fright during a performance, speech, or test. Yet, tenseness has actually been taught in the ballet classrooms for several hundred years along with the sister sins pull-up and tuck under – all the wrong feeling! Assuming that we now understand the Kneeland semantics and intangible feelings concerning proper posture, levels of body-weight energy, the use of downward energy and the state of neutral, it is time to apply this knowledge and these feelings to the art of classical ballet.

PROPER POSITIONS OF THE FEET

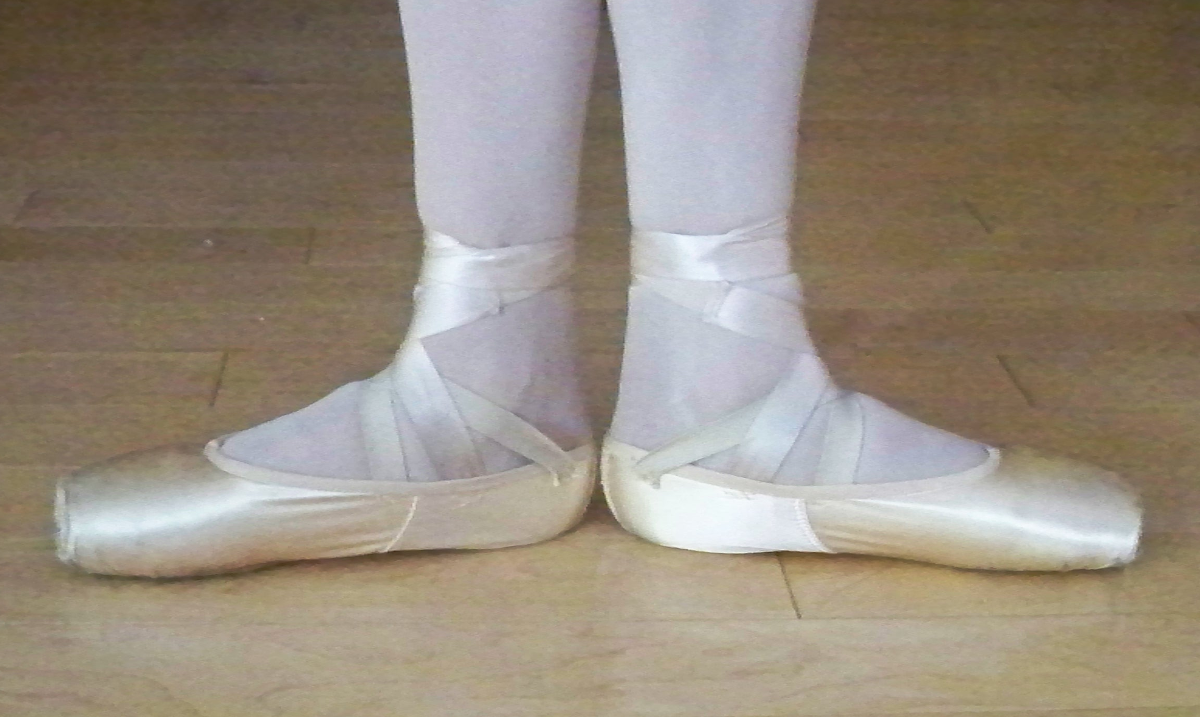
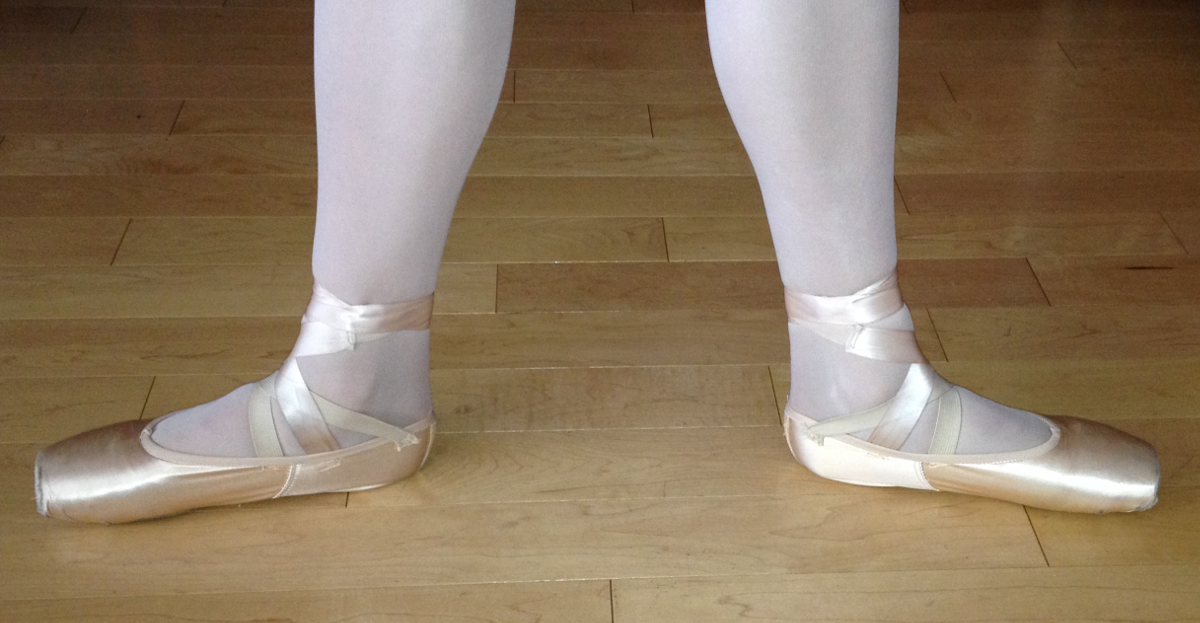
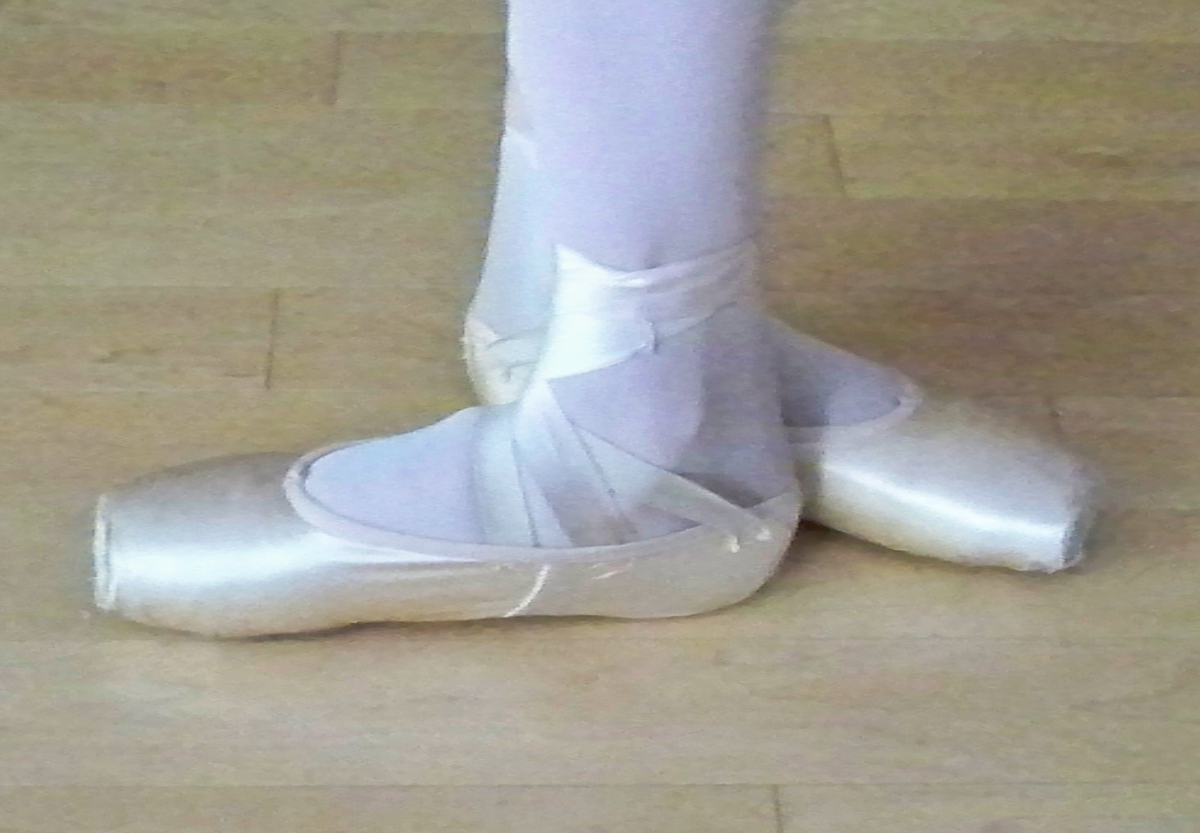
Of the five positions of the feet, only 2nd, 3rd, and 4th can be considered “standard”. Because of structural variances and irregularities, 1st and 5th must be considered the students’ own personal or individual positions. The reason for this deviation stems from anatomical irregularities such as hyperextension of the knees. Text supplied by the editor. Some people End of supplied text. cannot put their heels together in 1st position or assume a good 5th position without bending the knees. For students who have thick thighs, knock-knees or a narrow pelvis precluding turn-out Editorial regularization. turnout End of Editorial regularization., the problem is equally as troublesome. However, since we do not dance “in positions” but “through positions”, the audience will never see the spaces between the legs and feet of a less than perfect 1st and 5th so why belabor the point? I often joke about the fact that I’ve never met anyone who would spend $50 for a theatre ticket just to sit in the wings in order to observe if or not the performers were dancing in perfect positions. Ridiculous! Rather than being concerned about “perfect positions,” we should impress upon the students that they must start at the top of the body and work down. They must be certain that they have the right level of body-weight energy pushing downwards, the pectoral area correctly placed with the pelvis going naturally under the ribs and the knees, thighs and feet meeting in perfect 1st and 5th positions. If the knees are hyper extended, it may not be possible to get all leg parts together. If that is the case, then it would be wise to concentrate upon pulling the thighs and knees together and forget about the feet. However, it should be pointed out here that hyperextension can be improved by pushing downward energy while keeping the pelvis and body weight forward to relieve the backward pressure on the knees. Occasionally, we teachers are lucky enough to run across a student with a perfect 1st and 5th position, a good rotation in the hip joint and thighs, calves and ankles that are almost the same sizeEditorial correction. , End of Editorial correction. along with the well-proportioned classical body – the ideal trainable body! But how many of these “ideal bodies” does a teacher see? Most of the time, the greatest artistic talents are not born with the desired physiological advantagesEditorial correction. , End of Editorial correction. and since ballet is not considered a “natural” art because of the many unusual positions and steps involved, it is mandatory that great care be taken in the training process. Certain types of bodies will lend themselves well to the balletic activity whereas others will not, but that does not mean that the students with the so-called imperfect bodies cannot make a dancing career for themselves if they so desire. They simply must be willing to train in a different way in order to overcome their limitationsEditorial correction. , End of Editorial correction. and the teacher must have the patience to work out a safe program of instruction which fits each student’s needs.

INJURIES

A teacher’s first concern for these students should be safety. For example, let’s examine these “imperfect” bodies which cannot assume an adequate 1st or 5th position according to the classical ideal and demand that they train according to the ideal. If the teacher insists that the tail be under, that the knees be straightEditorial correction. , End of Editorial correction. and that the feet be together in perfect position – something has got to give – and it is usually the cartilage in the knees! One could argue that the injury happened as a result of bad training, but that is generally not the case. Surprisingly enough, most of these injuries occur under teachers with excellent classical training and extremely high standards. Furthermore, it happens with disturbing frequencyEditorial correction. , End of Editorial correction. because these teachers want more than the students are capable of doing in Text supplied by the editor. order End of supplied text. to satisfy the ideal. In other words, the more demanding a teacher is without the proper application of the art to the anatomy of the student, the Text supplied by the editor. more End of supplied text. lethal a weapon that teacher becomes! Conversely, the sloppy teacher with less impressive credentials simply would not force students to do those things. What we need here is the formula to understand “how to” apply the art anatomically to get the best results possible without injury, and I have tried to make it simple by saying that the body takes care of itself from the top down – chest, ribs, pelvis, tail-bone stacked in alignment with thighs and knees together. If there is a little space between the feet, it is of no great import. Before I am hung in effigy, however, I would like to explain that the students should not be allowed to work in these positions forever just because they could not do any better in the beginning. On the contrary, we should encourage them to do whatever is necessary to improveEditorial correction. , End of Editorial correction. whether it be spot reduction or rotation exercises for the hip joint to increase turnout and bring the feet closer together toward the “ideal” position within the safety zone.

TURNOUT

The art of classical ballet is based upon the turned-out position so it is always of great concern just “how much” turnout is safe for each student to use in the beginning of training. Here again, we must consider the physiological gifts the student has. One of the best ways that I have found which seems to work for everyone is a funny little exercise which I call the “wooden leg”. It seems to put across the idea that turnout comes from the hip joint and not from the knees, ankles or feet. Moreover, it is indicative of the degree of turnout which each individual is capable of achieving without injury and/or wasted effort. To begin the exercise, have the students face the barre in parallel first position with both feet on the floor and with the body weight higher than floor level. When they think that they can actually feel this high level, have them transfer the weight to the left leg without losing the feeling of height, so as to free the right legEditorial correction. , End of Editorial correction. which will then remain in a flexed-foot position close to but not on the floor. Tell the students to imagine that they have a right wooden leg which is totally stiff and can only make small movements from the hip socket which goText supplied by the editor. es End of supplied text. back and forth from parallel first to turned-out first position. This exercise should be repeated several times and on the third or fourth time, they probably will have reached their maximum rotation, at which time they should put the foot down on the floor in a turned-out position. That will be the proper degree of turnout from the hip joint for the right leg – providing the alignment from the front of the thigh to the knee and on to the ankle remains exactly the same as it was in parallel first. To ascertain the degree of rotation of the left leg, the exercise should be repeated exactly on the other side. When the students have finished the total exercise, right and left, and are standing on two legs, they might be able to get a fraction more turn-out Editorial regularization. turnout End of Editorial regularization. by using the leverage of both hip joints outwards with the help of the pelvis, buttocksEditorial correction. , End of Editorial correction. and body strength, but that is all the turn-out Editorial regularization. turnout End of Editorial regularization. they should attempt in the beginning. Once again we are dealing with intangible and invisible feelings. The students should be encouraged not to accept the initial turn-out Editorial regularization. turnout End of Editorial regularization. as their final goal but to do exercises which will increase the rotation in the hip joint and improve their turn-out Editorial regularization. turnout End of Editorial regularization.. As they acquire increased rotation, they should make an effort to apply it to their technical vocabularies and work to control it. It is essential to impress upon the students that greater turn-out Editorial regularization. turnout End of Editorial regularization. requires more controlEditorial correction. , End of Editorial correction. and they should never be allowed to “settle” into the belief that their beginning position in the first stages of training is their ending position. Remember, a student will always be much more receptive to ideas and goals at the beginning of training because once the “feelings” have been developed, the student will tend to resist any change. So far we have discussed proper posture, levels of body weight, the use of downward energy, the elimination of detrimental words (pull-up, tuck-under, tighten), the neutral state of the body, acceptable turn-out Editorial regularization. turnout End of Editorial regularization.Editorial correction. , End of Editorial correction. and all the intangible feelings associated there-in Editorial correction. therewith End of Editorial correction. . Semantics has played an enormous as well as an important role in all of this because Text supplied by the editor. unless End of supplied text. we understand the component parts of a composition, it fails to become manifest. A dancer cannot dance that which is not understood, so how can we as teachers expect our students to understand when we lack clarity in what we teach? A good example of confusion concerns balance point.

POINTS OF BALANCE

Over the years, I have found the subject of “balance point” to be shrouded in an extraordinary amount of confusion on the parts of teachers and students alike. One of the major reasons for this confusion is the fact that no two people have exactly the same center of gravity or balance point because of anatomical differences. Another reason is that because of the wide variety of movements within the technical vocabulary, the balance of the body has to be re-balanced over a new support with each new step. This means that the balance point is constantly changing from two feet to one foot with various degrees of elevation, etc. To further confuse the issue, the semantics most frequently used are really indicative of “one balance point” only when in fact, there are a number of them. Consequently, the students will try to carry that one balance point to different positions and levels of energy without adaptation and the results are often disastrous. Therefore, we need to define what we mean by “balance point” and how to use it for best results. Actually, balance point is that point on the ground to which a body in the correct postural position should relate in order to be able to rise and lower without any loss of equilibrium and one which can be adapted to any step or position. For purposes of clarity, let’s assume that we are now standing in perfect alignment using the proper level of energy with the pelvis correctly placed under the rib cage, the chest high and the entire body in the “state of neutral”. This is the alignment which we wish to keep when we establish exactly where the balance point is to be for each movement and position. It will not remain the same for every position and that is why we must refer to “balance points”. At the risk of redundancy, I make a strong point of this because it is possible to balance incorrectly. For example, one can relevé with the body weight over the heels and not wobble at all if the rib cage and the tail bone are allowed to distend in opposite directions much like the letter “S”. One side simply counterbalances the other. Unfortunately, with a balance such as this, the posture is atrocious and needless tenseness and strain are set up within the body producing less than desirable results. Children with their flexible bodies are particularly adept at this sort of thing so they must be monitored carefully. To find the exact balance point on two feet, I would suggest the following exercise. Have the students stand facing the barre in parallel first position after putting some sort of coin under the balls of the feet. Make certain that their posture is correctly aligned; have them go up and down several times with the idea that they must bring their body weight down each time directly over the balls of the feet and over the coin. When the students have established the feeling of balance, they should open one leg at a time so that the legs are turned-out in a classical first position. In order to actually “see” where the balance point should be, the students should then look down noting the relative proximity of the coin to the heels of the feet and understand that even though the balls of the feet are no longer in parallel position, the coin designates the proper point of balance for the body. When the body weight shifts to one foot or to an elevated position with or without extension, then the coin or balance point must be moved to a new point of relative proximity. Let us assume, for example, that we want the students to stand on the left leg with the left hand on the barre and the right let in passé. Our first course of action would be to have them move the entire body weight from two feet to one in a semi-circular movement going front- side, centering the torso over the supporting leg which means that the ribs will actually be to the left of the foot. Obviously, the balance point is quite different now so the coin must be moved over the same relative distance in front of the left foot as it was in front of the two feet. At the same time, we have to be concerned with the position of the left rib in relation to the floor. Barring deformities, most students are generally equal on both sides when they are standing on two feet, but when they shift their body weight to one foot, they are going to have to make an adjustment in the rib cage of the supporting side by expanding it slightly to let the working side fit under it so to speak. This is another one of those intangible feelings which is imperceptible to the naked eye of the observer, yet the students should actually “feel” the supporting side grow stronger, pulling in and absorbing the flesh on the opposite side. Remember, once the feelings have become Text supplied by the editor. fixed End of supplied text. feelings, it is very difficult for the body to change and adjust to new feelings. Therefore, it is of utmost importance that all students understand the concepts concerning “points of balance” so that they can begin to build the idea within their minds that the supporting side must be strengthened and lengthened in order to maintain the “open” positions found in classical vocabulary. Let’s examine briefly several of the “open” positions beginning with développé à la seconde or the unfolding and lifting of the leg to the side of the body. Because of the extended appendage, the rib cage is going to have to be moved even further to the left of the supporting leg in order to counterbalance the leg’s now awkward weight--something it did not have when the leg was in the closed position of passé. In the développé à la quatrième devant or the unfolding and lifting of the leg to the front, the same principles apply except that a slight adjustment backwards toward the heel is now necessary to counterbalance the extended appendage. The amount of shift required for extensions to the front and side are predicated on the height of extension and the length and weight of the leg. The most difficult of all the “open” positions are that of the classical ballet poses – attitude and arabesque derrière. These poseText supplied by the editor. s End of supplied text. present a slightly different problem because we are dealing with “unnatural positions” for the human body. Anatomically, it is much easier to “lever” an appendage in front of the body than it is to the back. Therefore, the point of balance for these poses must be considerably forward of the supporting leg in order to overcome the physical restrictions which interfere with the extension of the working leg upwards behind the body—hip joints, buttocks muscles, body structure, etc. Finding the exact points of balance for the classical poses is dependent upon length of the legs, the torso, the limberness of the back and other anatomical considerations. On the bottom line, then, the students must find their “own” balance points through their “own” feelings garnered by experimentation with their personal physical instruments—their “own” bodies. The mechanics of balancing are the same for everyone, only the instrument differs. However, I wish to caution both teachers and students that it is dangerous to think in terms of one balance point because semantically speaking, this limits the balance to one point and one place. Thus, when the balance is moved, the result is an anatomical distortion which often resembles the perfect caricature of a “scrunch-in” cola can standing on one leg rather than a graceful “sylph or swan” poised to take flight. By this time, I hope that both teachers and students have grasped the importance of clarifying semantics in all aspects of dance training. We talk—but do we communicate? Misunderstanding and misinterpretation become “lethal weapons” in the hands of a teacher because what occurs in classroom training often haunts dancers for the rest of their lives if it doesn’t destroy a dance career outright. One of the best examples of this is encroachment of the free use of arms.

PROPER USE OF ARM POSITIONS

Probably the most widespread and destructive practice in the traditional training of ballet dancers is the instruction for the use of the arms. What good does it do if we spend years perfecting the dancers’ bodies if we isolate or render the arms useless? However, since the time of the infamous Ballet Masters hundreds of years ago, this has often continued to be the practice. Established ballet books, teachersEditorial correction. , End of Editorial correction. and even societies dedicated to the preservation of the dance arts have insisted that the arms be put into a preset circular position which is then moved rigidly from position “A” to position “B” to position “C” with little or no contributions from the joints towards the dance movement. This practice may be a result of the cumbersome costumes worn by royalty when ballet was originated, or it may have started simply because it is not an easy thing to use all the joints in the arm and prevent them from looking ugly or disjointedEditorial correction. , End of Editorial correction. particularly the elbow. Regardless of the origin, however, it does not mean that we should continue this practice today. Once a student gets that feeling of preset arm positions, a permanent muscular rigidity sets in causing fatigue, strainEditorial correction. , End of Editorial correction. and loss of kinetic energy along with the creation of “ugly lines” and “jerky movements”—the exact opposite of what is desired. Furthermore, without the contributions of all the joints in the arms, a student simply cannot execute the technical vocabulary correctly. What we need to do, then, is to build the right feelings and infuse them into the computer of the mind, preferably at the very beginning of training. We need to encourage the students to use all the joints of the arms by tuning into the downward energy (mini-thrusts) and to pull the back down—essentially all the same principles we applied to posture. Initially, of course, the students need to begin to learn the basic positions of the arms just as they did the feet so have them face the mirror and let them form “pretty circular positions” with their arms, such as fifth en bas, fifth en avant or fifth en haut and à la seconde. It is imperative to make them understand, however, that although these are pictures we wish to see, we do not want them framed and hung! Rather, we want to be able to move them freely from place to place anytime. Therefore, immediately after the students form the position, encourage them to move the arms in and out slightly, using every joint in order to free themEditorial correction. , End of Editorial correction. as well as the wrists and elbows before going on to “frame” the next picture. This way the students get the idea of the energy flow necessary for the continuity of movement and won’t be inclined to freeze into a position. For example, if we wish to take the arms from low fifth to middle fifth, we must first move the arms out and slightly away from the thighs and then take a little breath or release which causes the wrists to break. It is important to always remember that the arms are a “reactive” force and they move as the result of circular energy within the body, primarily in the area of the diaphragm and back. This is caused by the use of a “mini-thrust” of energy downwards and at the saturation point, we will begin to feel the arms moving freely upwards. In order to control the elbow, the back must continue to feel as if it is pulling slightly back and down. The arms should never be thought of as isolated movements. The à la seconde position or second position of the arms, frequently called the “working position” of all dance because of its universal use for balance, is one of the most difficult positions to control. If the arms are out of the “control zone,” if the posture is faulty or if the back is not pulling down, the arms will suffer fatigue and release the elbowEditorial correction. , End of Editorial correction. which then drops down and thrusts forward. This is not an easy problem to correct, particularly in cases of hyperextension of the armsEditorial correction. , End of Editorial correction. because of the difficulty in describing the amount of rotation necessary to control the elbow. How round is rounded? A funny little device that I have used for children (and some adults) to correct this situation is to have the students treat the elbow as if it were a person who is tired, but there is no place to sleep except under the fleshy part of the arm at the back. So we practice sticking the elbow out and hyperextend it looking for a bed, but when we can’t find one, we simply “round” the elbow once again—pulling against the back muscles—and at the point that we are in a good, stretched comfortable position, we have put the elbow to bed. It simply disappears behind the flesh of the arm. Other than where to put the elbow, there is another problem with the arms that is equally as troublesome and should be addressed. A smooth transition between arm positions is always of concern, but that occurring between high fifth and second position is difficult because after about six inches into the opening of the arms, we are fighting the elbow. The only way to overcome this is to “tune into downward energy” and feel as if we are “reaching” for the ceiling and the walls of the room. At the same time, we should feel as if we are “pulling” our back muscles back and downwards. So once again, I would like to emphasize that if the students can “tune into these energies and feelings” which we have been talking about, the arms won’t be such a problemEditorial correction. , End of Editorial correction. and they will have achieved “continuity and control.” No longer will the students have that strange “scrunched-up” look where the shoulders appear to grow to the ears and which is so often used as a parody of dance. Rather, the arms will have become visions of beauty.

CONTROL ZONES FOR ARMS AND LEGS

A part of this achievement depends upon the ability of the students to coordinate their body movements which brings us to the subject of what I call the “control zone”. The matter of control in dance should be of concern to us because all that we have discussed in regard to the training of dancers—proper posture, leg and arm positions, balance point, the state of neutral, etc.—will come to nothing if there is no control. Therefore, it is imperative that we set down certain criteria in order to ascertain the semantic meaning of “control zone,” because in the beginning of trainingEditorial correction. , End of Editorial correction. the students are simply going to open up their arms and kick their legs without regard to the area of control. It is going to be necessary to make them understand early on that if the arms and legs move randomly and go past the position required by dance technique, body distortion and loss of control are inevitable. In the case of arms, we are most concerned with the second position because it is the one most frequently violated. Invariably, when beginners open their arms, they go beyond the point of control. We need to encourage them to seek the area of greatest strength—where the back is strong, the body is balanced, the posture is correct—and not go beyond it. The arms should be slightly in front of the shoulders with a feeling of roundness, the body should be in alignment, the energy level should be high, the back should feel as if it is being pulled back and downwardsEditorial correction. , End of Editorial correction. and there should be an overall feeling of stretch in the body and extremities. That feeling should be maintained throughout all movement because it is indicative of a “free but controlled” body. Before the kinetic sense is developed, it may be necessary for the students to check these things peripherally on occasion. A good rule of thumb is to always remember that whenever the arms execute any movement or any port de bras, they, at no time, pass behind the position except on the way to arabesque which is quite a different topic. As to the control zone for the legs, “front” is as far front as the toe can point and levelEditorial correction. , End of Editorial correction. or in line with the middle of the bodyEditorial correction. , End of Editorial correction. and “back” is as far back as the toe can point and level, or in line with the middle of the body. However, “side” is only as far side as can be controlled without losing the strength of the back, the pelvic alignment, the rotation of the legEditorial correction. , End of Editorial correction. or in any way disturbing the posture. It should be strongly impressed upon the students that the quality of “open” turns in later training is predicated upon the mastery of these concepts and pelvic control. Additionally, the students should be urged not to be satisfied with their second position but work to improve it. However, we must also remind the students that they should never go beyond their optimum turnout in a step, movementEditorial correction. , End of Editorial correction. or turn because they could be seriously injured. If nothing else, it would certainly affect the quality of performance.

MOVEMENT MOTIVATORS

Everything that we have discussed thus far has been a kinetic preparation for technical studies and classroom work. The major preparatory topics remaining are what I call “movement motivators” which are concepts based upon Sir Isaac Newton’s physical laws and summarized as follows: For every action, there is an equal and opposite reaction. For every cause, there is an effect.

RELEASE AND RECOIL

I would like to begin with a concept which I call “releaseEditorial correction. , End of Editorial correction.” or a mini-preparation. It is a movement which is used to move the body out of the state of inertia in order to begin or change any step, movement or turn. Let us say that we have a body in the state of neutral in proper posture over the balance point and we are about to begin our movement. We need a force that is greater than the force of inertia to initiate the movement. So what we are going to do is release the energy which we have kept internalized in a dormant state, tune into that downwards energyEditorial correction. , End of Editorial correction. and thrust down. In order to be able to do this, however, we have to start by first making a small movement upwards. Sometimes, it is not much bigger than a breathEditorial correction. , End of Editorial correction. or it may be a tiny circular lift within the body which is combined with a breath to initiate the movementEditorial correction. , End of Editorial correction. to remove us from the inertial state and permit us to do anything we wish to do. Let us take a relevé as an example. We don’t want to just push down because that would “kill” the impetus. The kinetic concept is “up-to go down-to go up”. Again, we need to take a tiny breath along with an “upward lift” of the body and when we “feel” that lift, we must send the energy downwards. When the energy reaches its saturation point in the downward arc, it reverses itself and flows upwards energizing all the muscles in its path. As described previously, by this process we will have actually “pushed ourselves ‘down to’ the place where we could push ourselves tall.” As a matter of fact, by the use of this “release,” we literally push ourselves right onto half, Editorial regularization. ( End of Editorial regularization.demiEditorial regularization. ) End of Editorial regularization. or full pointes with no effort. In applying this concept to jumps, it works in exactly the same way except that we would now want a bigger release. It would be necessary to actually move the body weight up to the point that one should be able to see a small space between the floor and the feet because if we want to do more with this movement than just rise onto some position on the pointes, it requires a much larger output of energy to get into the air. For clarity, I always like to compare jumping to the bouncing of a ball because the same physical principles and mechanics are used. If we want the ball to bounce to hip or eye level, we would have to lift the wrist in a tiny circular motion (taking a release) and then thrust downwards (pushing downward energy). When the energy has reached its saturation point, it reverses and sends the ball upwards to the height demanded by the degree of thrust. If we wanted the ball to go to the ceiling, it would require that a larger action of the wrist be taken as well as a stronger thrust downward in order to achieve the maximum bounce or recoil. The action is always circular—never a straight line—and the degree of recoil is dependent upon the amount of release and thrust. A good rule to remember is that “a release should be taken in proportion to the degree of efficiency of the movement which is wanted from the body”.

CIRCULAR ENERGY

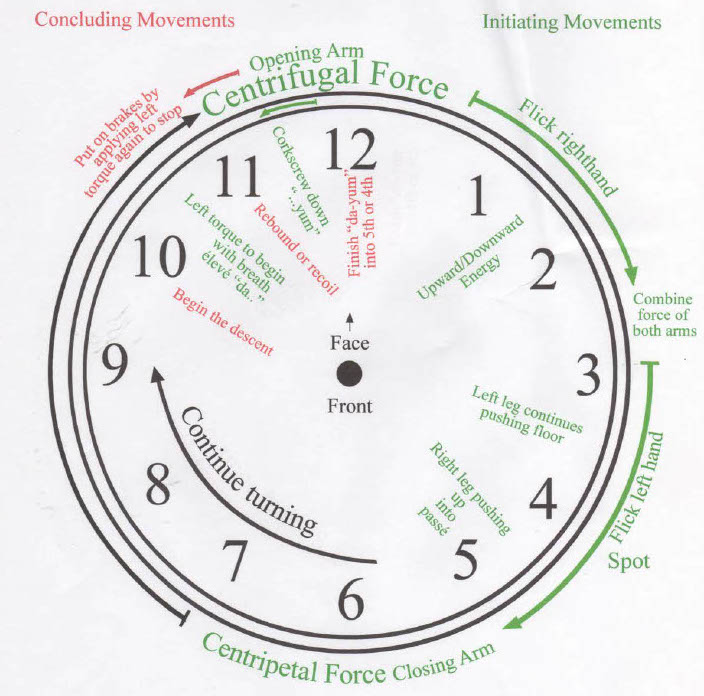
Up until now not much has been said about “circular energy”. However, it is one of the most important concepts in the Kneeland Methodology and should be discussed before the students begin technical training. It is important that the students understand that “all energies must flow through their bodies in circular patterns.” This is because straight lines come to an end, and if energy flows in a straight lineEditorial correction. , End of Editorial correction. it ceases to be effective. I think this would be a good time to point out that such bad habits as gripping, clamping, tucking, pulling-up, etc. create tenseness within the body, causing energy to come to an endEditorial correction. , End of Editorial correction. whereas circular energy creates tensionEditorial correction. , End of Editorial correction. which permits all energizing forces to flow freely and continuously throughout the body. Remember that energy output in a straight line ends and throws us back into the state of inertiaEditorial correction. , End of Editorial correction. which forces us to look for a whole “new motivation” to stimulate action. On the other hand, circles have no end and any movement which has a point of thrust somewhere in a circular pattern is going to have continuing force and flow of energy. This premise is based upon the scientific theory of the parabola which proved that anytime we want an object to go to a certain height, we have to have the same equal amount of thrust on the other side, plus momentum and mass, and the path is circular. The physicists at Florida Atlantic University in Boca Raton made us a simple device for demonstration purposes. It was a little clock face having a nail stuck in the middle with a handle on it which functioned much like the hand of a clock. It was constructed in such a way that the handle could move freely around the nail, and if we lifted the handle at three o’clock, it would automatically rebound and recoil over to nine o’clock. If we started the hand at two, it would go around to ten, and five would go to seven, etc. In other words, to get the proper amount of action required an equal thrustEditorial correction. , End of Editorial correction. and I believe it is clear by now that we are dealing with equal and opposite and cause and effect factors. In the cases of circular energy, however, we do not always have that equality of thrust because we also have to deal with mass and momentum. Nonetheless, it is of utmost importance that the students be made to understand that every step in the technical vocabulary has to work with an “equal and opposite” reaction and that every movement must be circular. Again, I will emphasize the point that this circular action must be something that the students can “visualize” and something they can “feel” rather than something that can be seen objectively. At this point, we have discussed all the necessary kinetic concepts and principles with which to start basic dance training or to improve the execution of technique at any level. Indeed, if we have managed to stimulate your imagination or have aroused your curiosity, then it is time to analyze the constituent parts and the kinetic composition of the technical vocabulary. Moreover, since ballet training begins at the barre, that would be the logical place to start because it is at the barre that dancers form the muscle memory, kinetic traits, internal feelingsEditorial correction. , End of Editorial correction. and body habits which follow them through their dancing lives. It is also the place in which the most mistakes are made. By definition, barre work is a collective exercise presented in logical order to progressively warm the muscles and prepare all the body parts for center work. Too often, traditional methods of training fall short or achieve the opposite of this goal by the insistence of absolute turnout, zero movement of the torso, limited movement of the armsEditorial correction. , End of Editorial correction. and a rigidity of muscle structure which builds “isolation” into the body to the detriment of movement. “Pull up!” “Tighten the buttocks!” Do these words sound familiar? It is imperative that students begin barre work with some understanding of basic kinesiology. This includes such concepts as the neutral state of the body, proper posture and alignment, the control zone of the arms and legs, theory of equal and opposite, body torque, and vertical and horizontal energies. Although this sounds very complicated, there need be no concern about the age of the student. An academic approach can be altered to fit the needs of each age and each level of training because we are dealing with the “guts of life”—walking, jumping with all the accompanying feelings.

PRINCIPLES OF KINESIOLOGY

AT THE BARRE

PLIÉS

PROPER POSTURE: In dance terms, the definition of a plié means a partial or full bending of the knees. The function is to prepare the leg for the exercises which follow.I am emphasizing this point because many students, particularly beginners, take that definition literally and without any thought being given to the equal and opposite theory, they simply bend the knees, dropping the whole body mass into the force of gravity. It is no wonder that the legs and feet pronate, the torso distorts, the arms droop, and the whole body is thrown out of postural alignmentEditorial correction. , End of Editorial correction. making productive work impossible. All the points for good posture which I have previously discussed in this discourse should be applied here. The body needs to be in the neutral state so that when the release is taken, it tunes into the downward energy which then reverses, sending equal and opposite forces throughout the body. Without effort, the pelvis will be under the ribs, the ribs under the chestEditorial correction. , End of Editorial correction. and the pectorals will ride high. However, unless such students are made aware of and apply the kinetic principles governing the dance vocabulary, they will be well on their way to building bulky musculature subject to injury as well as diminishing artistic satisfaction and excellence. ESTABLISHING THE BALANCE POINT: Since all the positions in plié will be on two feet, the body weight will be equal on both in each position but slightly forward of the body so that the weight rests toward the balls of the feet and not the heels. The balance point changes with each position and in élevé according to the principles presented earlier in this text. INITIATING THE MOVEMENT: The body in the neutral state needs a motivating force greater than itself to move it out of the state of inertia. It can be a breath of air, a slight “push” against the floor in order to lift the body higher, a feeling of a small circular action within the diaphragm which circles back, “pushing” diagonally upwards and out and down through the body. We call this motivating action a “release” and it should be taken before each plié or any other step or movement that is attempted. THE USE OF GRAVITY: After the body takes a release and the body weight is slightly elevated from the floor level, the energy begins its thrust downwards through both feet. When it reaches the saturation point, it automatically reverses itself and pushes back up through the body giving it buoyancy and that desirable chest-high, stretched- out, pulled-up look. The energy released in this manner actually “pushes the body tall” and regardless of the degree of the knee bend, the body remains in proper alignment with the body parts in their respective control zones. When the principles of physics are applied, there is no need to “place” anything. CIRCULAR ENERGY: To avoid gripping, clamping, tucking, etc., which are tense, binding actions that shorten any movement, the students must be made to realize that all energy flows through their bodies in circular—not straight patterns and anything that cuts these circles inhibits movement. For example, if the body weight is back of the correct balance point at the start of the plié, without a circular release the body will lower straight down over the heels, which throws the balance point off, shortens the normal bend of the knee, and dissipates the energy necessary for the return trip. Conversely, when a release and circular energy are used, the body weight and mass is automatically pushed upwards and forward to the point of balance which accommodates the proper depth of the descending bend and still provides the necessary impetus for the ascension. THEORY OF EQUAL AND OPPOSITE: Initiating the release and the use of gravity with circular energy are an amalgamation of the equal and opposite principle—cause and effect, action and reaction—and as such can be applied to the entire technical vocabulary. To turn right, we need to torque left. To travel right, we need to transfer the weight left. To balance requires counterbalance, etc. In the case of pliés, this principle is of vital importance, particularly in the crossed positions of 3rd, 4th, and 5th. The corresponding side of the body must be in opposition to the “working” foot, the one that moves to the front, side or back, so that the feelings of equal and opposite are ingrained in the body and mind. If these feelings are not sufficiently developed during the course of pliés and subsequent barre exercises, the execution of the entire technical vocabulary will be affected. For example, if the crossed position is not maintained by opposition in the pliés, chances are the hip or the same side of the body will follow the leg in tendu, dégagé and grand battement which eventually affects the line and balance point in arabesque and attitude, etc. Carrying it a bit further, all turns will be affected as well as adagio. INTEGRATING THE MOVEMENTS: Before beginning the plié exercise, the body must be in the neutral state with the body parts in correct postural alignment and the weight distributed evenly on the balls of the feet. After a breath or a small release upwards of circular energy, the body “keys” into the feeling of pushing downward energy which reverses itself and traveling up through the body, it circles through itself and traveling up through the body, it circles through the back and out of the chest pushing the pectorals high with all the body parts falling into alignment underneath. In a crossed position, the feeling is a spiraling action (around and up) to achieve equal and opposite tension. With the use of circular energy through the back, the arms are able to move freely within the control zone with all the joints contributing without muscular rigidity of the traditional “preset” arms positions so often used in pliés.

BATTEMENT TENDU, DÉGAGÉ, AND GRAND BATTEMENT

There is no need to break down the component parts of each of these steps because the principles are exactly the same for each except in the degree of extension, the amount of release and thrust and energy output. Therefore, we will analyze the component parts of battement tendu and apply that knowledge to the other steps. PROPER POSTURE AND BODY ALIGNMENT: All the points previously described in this discourse should be applied here. ESTABLISHING THE BALANCE POINTS: Initially, the weight will be divided between both feet. When the body “release” is taken and the “thrust down” of both feet occurs, it releases one foot and the body weight will shift over the supporting leg. Depending on the path of the working foot—front, side or back—the balance point will shift slightly beyond the foot in a direction opposite the working leg and will resume the initial balance point when the leg returns to the starting position. INITIATING MOVEMENT: The execution of battement tendu or any other action taken by the working leg is a cooperative effort of the whole body and should never be looked upon or treated as an isolated event. It is a physical fact that body parts cannot work in isolation and be effective or 100% free from trauma. It is imperative, therefore, that the student be taught as soon as possible that impetus for leg action originates as a small invisible inner circle of energy contained within the diaphragm and the body. Before each tendu, this energy must be activated by a “release” which sends it in “equal and opposite” directions down through the legs and back up through the body as counter balance. It also radiates through the arms from the back. PATTERN DEVELOPMENT: As both feet press strongly into the floor, the body weight is lifted upwards and then thrusts downwards to create a “fishhook” type of energy which transfers the weight to the supporting leg and frees the working leg. At the same time, the arms are “emulating the leg action”, thrusting down slightly as if they were hitting an indivisible Editorial correction. invisible End of Editorial correction. floor. The impetus of these movements is circular in nature even though the pattern direction may appear to be straight. The use of kinetic principles results in a “strong arc against the floor and an equally strong opposition in the corresponding side of the body”. Done in this way, the foot will have reached its destination in correct form—proper turnout, groin pulled back and away from the leg with the supporting side pushing forward over the balance point. The path that the working foot should follow to the front and to the back of the body is straight out and straight back. However, the tendu to second position requires a slightly different technique. Using all the motivational forces as described above, the foot going from fifth front through à la seconde to fifth back should arc out to the side in as straight a line as the “control zone” permits, but it should close on a diagonal line to the back and vice versa. (This action is somewhat comparable to the mathematical symbol meaning “more than or less than” {>} [><]). There are many reasons for this deviation such as less than perfect turnout, large or fat thighs, body build, etc. However, the major reason is that if we force straight lines, the postural alignment will be disturbed resulting in structural injuries. Moreover, the oppositional energy of the body in tendu à la seconde simply cannot be torque as much as it is from fifth position front or back because of potential body distortion and, therefore, the leg must compensate by using the diagonal closure in order to stay within the “control zone”. ARM MOTIVATION: The motion and energy in the arms should actually “mirror” in miniature the action of the body and the legs in every step. As the release is taken within the body and the downward thrust and equal/opposite energies are engaged, the arms react in like action to that motivation staying within the “control zone”. The feeling within the elbow is like a little circular eight and a small “bouncing” action as if hitting a floor. There should be a “floating” quality. INTEGRATING THE MOVEMENTS: To do a battement tendu, dégagé or grand battement correctly requires an initial upward release of the body which then thrust downward energy as if drawing an arc through the floor creating circular energy and equal and opposite forces. These actions provide the impetus for movement and direct the leg and feet patterns. One of the most important aspects in the execution of tendus, dégagés and grand battements is the use of the “energy arc” for extension with a corresponding arc in the body and arms. A straight line cuts this energy. The higher the working leg must go or kick, the greater the release and the arc of energy sent outwards. The path of the foot arcs as far as its destination allows within the control zone—full foot, half, three-quarter, ball and toe—and ultimately swings free in a dégagé or grand battement. With the proper use of kinesiology throughout the body, the “crossed” positions are maintained easily, no bulky muscles are built by hips going with the leg or legs contracting to hold the extension. Further, the amount of extension is increased and the legs are long, suppleEditorial correction. , End of Editorial correction. and slim looking because of the use of circular energy rather than straight lines.

ROND DE JAMBE À TERRE

As it was pointed out previously in this discourse, barre is a “collective” exercise with every step building upon the previous ones. Rond de jambe à terre is simply two tendu actions openingEditorial correction. , End of Editorial correction. closingEditorial correction. , End of Editorial correction. from different directions with the connecting arc. If done properly, it not only warms the hip joints but has the potential for increasing turnout. All too often in traditional training, however, no body movement is allowed which makes it very difficult for the leg to rotate in the hip socket. If the height of the extension is increased, the body distorts and the muscles grip. Therefore, in order to get maximum results from the exercise, the kinesiology must involve circular body movement as well as circular leg movement. PROPER POSTURE AND ALIGNMENT: The kinetic principles and concepts described heretofore also apply here. BALANCE POINTS: The balance points for the rond de jambe à terre are no different from the tendu in the front and back. The major difference lies in the moving arc which means that the balance point is constantly changing. INITIATING THE TORQUE: The same principles used for tendu also apply here—release, thrust, equal and oppositeEditorial correction. , End of Editorial correction. and circular energy. The primary difference is the arc connecting the two tendu actions and the balançoire action through first positionEditorial correction. , End of Editorial correction. which causes the body to generate a spiral-type rotation in opposition to the working leg. MOVEMENT OF THE ARMS: Because the arms are a reactive force, they will move in a slight undulating action as the body moves. As said previously, the arms emulate in miniature the movement of the legs. INTEGRATING THE MOVEMENTS: When the release is taken, the body lifts and then thrusts down in a “fishhook” type circular action which transfers the body weight over the supporting leg, frees the working leg and creates equal - opposite energy in legs and torso. As the leg draws the circular pattern, the body torques slightly to accommodate the movement of the leg in the circumference of the arc and lets the leg rotate freely with the hip joint. As the foot closes the tendu action and slides through first, there must be sufficient pressure on the floor to create a feeling of opposition of the legs, an action which serves to increase turnout as well as providing impetus for continuous torquing of the body. As a result, the arms are also making a slight circular action and the feeling is one of total body movement, every part in coordination with the other. If the leg is to be taken en l’air, all the principles used are exaggerated. (For rond de jambe en l’air, see Dance Magazine article 1966).

DÉVELOPPÉ, FONDU, FRAPPÉ AND PETIT BATTEMENT

Since développé was discussed previously in this discourse, I will not give it much time here except to say that all kinetic concepts and principles apply. The neutral state and proper postural alignment is necessary and the balance point moves over according to the proposed extension of the leg. The release is taken in proportion to the action required, the energy is circular, equal and opposite and the arms and body work within the control zone in a coordinated effort. The primary difference among these steps is more a matter of dynamics rather than mechanics—extending, melting, sharpEditorial correction. , End of Editorial correction. and percussive.

THE PIROUETTE PUZZLE

I wish that I had a dollar for every person who has said to me, “I can’t do a pirouette” or “I’m just not a turner” and I would be a rich lady today. Unfortunately, these remarks are indicative of the self-limiting, depreciating attitude which permeates the dance world and which is totally unnecessary. Knowledge is available, but as victims of traditional training methods, these poor souls have simply never been taught to turn. So the puzzle remains and of all the steps found in the classical vocabulary, none is so desired, pursued or misunderstood as the “elusive” pirouette. Shrouded in mystery, the dancers who consistently whip off multiple rotations are looked upon as being akin to divinity or otherwise endowed with supernatural abilities few of which we mere mortals possess. Actually, there is nothing magical or mysterious about a pirouette. Simply defined, it is a scientific equation composed of ten elements of movement combined with special kinetic energies all of which must be done in sequential order to ensure success. If one happens to omit an element or alters the sequence in any way, such as neglecting to spot, adding rotative power before the balance point is established or applying counterforce at the wrong time, the pirouette will be faulty or fail. Although it is never too late to retrain the body, the training process would be so much easier and better if all beginning dance students were taught the pirouette components and how to coordinate them from day one. This, unfortunately, may be a difficult task if not an impossible one because historically we “teach as we have been taught.” One of the most common practices in teaching of pirouettes has been to divide the instruction into two separate activities—the preparation and then the turn. Unfortunately, this not only tends to negate most of the necessary components for rotation but destroys the “feeling of continuity”. It is imperative that the pirouette be treated as one activity and one feeling with two distinct but overlapping phases, the first phase dealing with the components of preparation which in turn initiates the second phase components of rotation. A third phase which is really a part of the second deals with counterforce, spotting and audio-tonal rhythm. One of the best examples of what I am talking about, deals with the practice of giving “partial- turn” exercises (1/4 and 1/2) before attempting the full pirouette. This has to be one of the most counterproductive practices ever devised for the teaching of pirouettes because it builds into the body all the wrong feelings! It requires that the weight be equally distributed between two feet in the preparatory 4th position which puts the balance point back of the turning point and forces the body into élevé before the rotative power can be engaged. This tends to inhibit torque, curtails the downward thrust, diminishes the vertical energy, encourages the wrong use of arms, demands that the leg be “placed” in position, disturbs the natural rhythm of the stepEditorial correction. , End of Editorial correction. and uses unnecessary energy which is spent too soon and tires the dancer. What a shame that so much effort is given to an exercise such as this when it is not beneficial for the teaching and performance of pirouettes and when the step is actually not that difficult if one follows the “correct” formula. If the body is properly balanced and if the right amount of torque is released at the proper level with the correct use of the arms and timing, the leg will automatically join into the rotative force and finish in a beautiful turned-out position without any overt action from the dancer except a push from the floor with the working foot. Moreover, when spotting, counterforceEditorial correction. , End of Editorial correction. and audio-tonal rhythm are used in combination with all the above ingredients, multiple pirouettes are effortless. It is interesting to note that throughout my ten-year study of great dancers in performance, this was the “kinesiology” used. This cycle must be broken! In the teaching of pirouettes, we must include a “specific breakdown” of the ten basic ingredients so that the dancer learns the sequential relationships as well as the motivation and the dynamics required for movement in a rotative pattern. Once this “knowledge” and these “feelings” are ingrained in the body and the mind, it will not be a question of executing one pirouette nicely, but “how many”! Furthermore, it should also be pointed out here that all the principles which are used for pirouettes are also applicable in varying degrees to every other turn in the technical vocabulary.

THE TEN BASIC ELEMENTS FOR PIROUETTES

The Neutral State of the Body: The starting position for a dancer should reflect energy that is stored and not already dissipated. Avoid any stretching out or “pulling up” of the torso, encourage the student to stand with good posture and be “Alert, Aware, Anticipating”…Ready to Go! (The 3 A’s). Good Posture or Proper Body Alignment: The pelvis must be controlled under the rib cage, thighs and knees together, and the feet as close together as possible without disturbing the aforementioned. The students should also combine the neutral state and good posture with balance point. Balance Points: For pirouettes, there are two points of balance that are necessary. One is slightly in front of the feet and the other is slightly outside of the body on the side which is going to be the “supporting side”, (i.e. the left side if one is turning en dehors to the right and vice versa.Text supplied by the editor. ) End of supplied text. Rotative Force: The ribs should be trained to freely rotate around the “spine” rather than moving the body in “one piece.” Energy should be generated from the inside out and not from the outside in. The Proper Use of Arms: One arm generates centrifugal force and the other arm “counterbalances” by contributing centripetal force. They must work correctly and in line with the above-mentioned points concerning “rotative force.” Upward and Downward Thrust: The dancers should be encouraged to use a downward thrust for all relevés and jumps and this includes the part of the pirouette which takes them to relevé. There are many reasons for this principle including the force of gravity which runs from “top to bottom” and not from the earth upwards. By raising themselves slightly off the heels, the students are using gravity as an ally rather than fighting against it as they would be if they did a plié first and then tried to “push” themselves toward a relevé. Counterforce: This is the resistance of energy in two directions within the body—vertically and horizontally. The dancers should “feel” as if they are using the floor to “push themselves tall” and at the same time “feel” as if they are also “pressing against the front and the back walls” to resist them. Counterforce should never be applied as a feeling until the previous six elements have taken place. This is what engages the ligaments and tendons to align them and to make them strong enough to keep the dancer on balance throughout the course of the pirouette. The Proper Positioning of the Working Leg: The positioning of the leg upon the knee in passé must be just as correct as if it were “placed” there in a pose. However, the leg arrives at its destination as a result of the rotation and the use of proper kinesiology. Spotting: This device is essential for the timing and continuity of a turn and without it, the other elements discussed here will be “scuttled”. Audio-Tonal Rhythm: This is the sound pattern and tones that dancers hear in their minds regardless of the rhythm of the music. It has an important effect on the execution of the step because the body will apply its “point of thrust” according to Text supplied by the editor. the End of supplied text. mental inside pattern of sound. If the dancers hear the wrong sound pattern, they will put the point of thrust in the incorrect place and the pirouette can be missed because of this.

INTEGRATING THE MOVEMENTS

For the sake of emphasis and clarity, I often liken the execution of a pirouette to that of making a white cream sauce. The recipe for this sauce is simple in composition, merely calling for flour or corn starch, water, salt, butter, and heatEditorial correction. , End of Editorial correction. but the manner in which those ingredients are combined and how they are cooked is a complex matter. For example, if the dry ingredients are not thoroughly dissolved in the water prior to the application of heat and if the mixture is not constantly stirred during the heating process which must be kept at a low-energy levelEditorial correction. , End of Editorial correction. the end result will be an inedible “lumpy” concoction. A pirouette is much like that. Its composition is relatively simple, but in order to attain a smooth rotation or multiple revolutions without the “lumps” of jerky, off-balance maneuvers, the ingredients must be added in the correct order and with the proper amount and application of energy. The first phase of the pirouette must include the first three elements and be “one feeling”. All of these elements can come out of a simple dégagé to the fourth-position preparation or another preparation of choice. However, it must be understood that in order to turn, the body must begin in the neutral state in the proper postural alignment over the turning or balance point at a body-weight high enough to permit “pushing downward energy”. I would like to digress briefly to talk about the traditional fourth-position preparation procedure which requires that the body weight be distributed equally between two legs. Since the pirouette is going to take place on one leg, this practice is totally illogical and detrimental to the success of a turn. In the first place, it initially puts the balance point approximately ten inches back of the turning point which means while the first three elements should be happening, the body is struggling to establish the point of balance. Moreover, achieving a point of balance is difficult enough in itself and to add something as disruptive as rotative force to a body that is precariously balanced is asking for trouble because once that force is engaged, there is no possible way that a balance point can be established. Why do we continue to give “deference” to a practice which is counterproductive just because it has become traditional? It would be far better to place the balance point over the supporting or turning leg to start with, leaving the working leg lightly upon the floor and “free” to act as a pusher at the moment of thrust. That way, we have taken care of the neutral state of the body, proper postural alignment and balance point—all in one action—which enables us to continue with the second phase. At this point, we are ready to add the torque of the body, the rotative force, the proper use of the arms and the level of energy necessary for the lift of the body to initiate the downward thrust generating a reversal of energy upwards into counterforce—all one feeling and a continuation of phase one. Traditional training has often viewed torque as winding up and a “trick” not to be tolerated. However, torque provides the impetus necessary for the release of rotative power. Also, as stated earlier in this discourse, the arms are a reactive action and torque provides the stimulus for arm movement as well as the “flick of the wrists” which key into centrifugal force (opening arm) and centripetal force (closing arm). The arms then come together in the usual traditional middle fifth position in front of the diaphragm for the remainder of the rotation or revolutions. Once the body has torque in the opposite direction of the turn and a “release” or upward lift of the body has been taken, it is time to “thrust downward” creating the vertical energy necessary for counterforce. At the same time, rotative force has been generated and the ribs will rotate around the spine in a two-fold “spiraling” action—one pressing downward energy while the other goes upwards through the body as counterforce. It is at the point of thrust that everything in the first and second phase “gathers” together ending with the “push-off” of the working leg into passé. This brings us to the last part of the second phase or what is sometimes called the third phase. This includes counterforce, spotting and audio-tonal rhythm—the devices whereby continuityEditorial correction. , End of Editorial correction. rhythm and timing are possible and without which the pirouette is impossible. A dancer could do everything that I have been talking about but if the timing is off, the pirouette fails. When and where was the moment of thrust? Was the torque too little or too much and was it applied at the right time? Were the arms “preset” or were they allowed to move freely as a reactive force? Was the counterforce applied at the right time? Once again we are back to the “cream sauce” theory or the sequential order of ingredients which is pulled together by the audio- tonal rhythm or the “sound” of a step and which has no relationship to the music played. In the case of a pirouette, the sound has two divisions to fit the two phases we have already discussed which might be summed up as “equilibrium and rotative force.” Remember also that I talked about the pirouette as being “one activity” and “one feeling.” The audio-tonal rhythm originates at the moment of downward thrust and “keys into silence” thereafter. Therefore, after an original sound of “da-yum” for impetus, silence is necessary to concentrate on counterforce, etc., in order that the rotation can remain perfectly balanced. In the interest of clarification, let’s use the clock face to “time” the sequential order. If we wish to do a pirouette en dehors to the right, we would start facing 12 o’clock in fifth position and do a simple tendu to the fourth position. By the time the right foot has reached that position, the body will have torque left to approximately 10 o’clock and at a high level—not a deep plié. The right wrist will flick outwards toward 5 o’clock, the right rib will be pulling backwards toward 6 o’clock generating rotative power. By the time the right hand has reached 10 o’clock, the body has reached 5 o’clock and the foot has pushed off the floor to the passé relevé position creating the energy for counterforce. Between 5 o’clock and 10 o’clock, the left wrist flicks inEditorial correction. , End of Editorial correction. providing the counterforceEditorial correction. , End of Editorial correction. and everything pulls together. Done in this way, a single pirouette is nothing and multiples are just a matter of continuous spotting, torquing of the body and audio-tonal rhythm. To end a pirouette or a series of pirouettes smoothly, it is necessary to start thinking about the ending at 7 or 8 o’clock or approximately one-third of the clock face before facing front. The arms do a little “fish-hook” pattern from the center of the body outwards and the body itself resists horizontally two ways, both outwardly and to the front. The body also does a “recoil” or cushioned vertical action and the audio-tonal rhythm must change from silence to a “da-yum” sound. One thing to avoid is the “dump” sound where the whole body gives into gravity and the pirouette loses control or aborts. I realize that this has been a lengthy dissertation on the mechanics of pirouettes, but if the students understand the composition of a pirouette, they will understand the “kinetic” principles of all turns. In the case of pirouettes en dedans, the same principles apply as in pirouettes en dehors. However, the wide-open “preparatory lunge” requires a different impetus for gaining equilibrium and the arms follow a different pattern when the overhead position is used. These differences are well-described in the section concerning open turns and attitudes en dedans.

Kneeland Turns Worksheet for Pirouettes
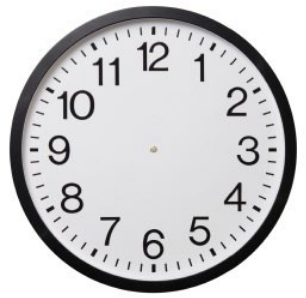
Pirouettes En Dehors
Pirouettes En Dedans

FOUETTÉ ROND DE JAMBE EN TOURNANT

One of the most dazzling, exciting and coveted steps in the classical repertoire and one which is required by all female dancers whether they are in the corps de ballet or soloists is fouetté rond de jambe en tournant, generally known as “fouettes”. This step when executed in a series looks extremely difficult and demanding, but with the proper use of technique and energy, it is an easy step to do. The first thing that must be understood about fouettes is that when a series is being performed, what is actually happening is not multiples of the step as it appears, but one step or one continuous action being completed over and over again with the ribs revolving around the spinal column in order to create the torque necessary to move the body mass in a steady rhythmic pattern of rotation. The use of the ribs in fouettes is very much like the use of the ribs in pirouettes. Unfortunately, torque for either turn is not taught in classical ballet and in the case of fouettes, the traditional method of training prohibits torquing the rib cage. One of the reasons is that preparation for this step has historically been given as a barre exercise which means that since one hand has to be on the barre, movement is precluded. Even if this were not the case, however, traditional training has always required that the shoulders be kept square and in alignment with the hips during the extension and opening of the leg. To do fouetté preparation at the barre is a wonderful way to discipline the leg for the turn, but the danger in this practice is that without the involvement and use of the torso at the same time, the power of rotation is literally trained out of the body and out of the step. It also tends to inhibit the use of arms as a reactive force, throws the rhythm offEditorial correction. , End of Editorial correction. and makes the execution of fouettes unnecessarily difficult. It would be my suggestion to those teachers wishing to give preparatory exercises for fouettes at the barre that they proceed with the knowledge that unless the whole body is involved with the rotative process, the end result will usually be less than desired. Therefore, because of the inherent difficulties of fouetté training, I have included in this section two full-body exercises, one for the barre and one for center, to aid in the instruction of this step.

KINETIC ELEMENTS OF FOUETTÉS EN DEHORS

NEUTRAL STATE AND PROPER POSTURE: As described in the section on pirouettes, fouettés must also begin with the neutral state of the body and good posture with proper body alignment. ESTABLISHING THE BALANCE POINT: There are two balance points to consider in the execution of fouettés. In the preparatory stage when the working leg is extended in croisé plié, the balance point is slightly back and just under the buttock of the supporting leg. During each revolution, the balance point gravitates forward directly over the supporting leg as if it were a pirouette and rolls up briefly to the relevé-passé position. In the course of many revolutions, the balance point is constantly changing and working in a circular manner from front to back with the accent being down. INITIATING TORQUE: When the working leg is in croisé plié, the same shoulder and arm should be as far as possible in alignment with the leg. At the same time, the opposing shoulder and arm should go back as far as possible in the other direction, on a diagonal line, the back and spine being totally visible to the audience. This position creates torque of the torso which will be released when the working leg opens to à la seconde and gathers into the relevé-passé position. PROPER USE OF THE ARMS: At the moment of rotation, the opening arm and hand should be flicking outwards away from the body to generate centrifugal force. As a simultaneous action, the closing arm and hand should be flicking backwards throwing energy away from the body creating counterbalance to keep the body and the step from traveling forward. By the time the body has rotated to the relevé-passé position, the closing arm will have circled around to join the opening arm in pirouette fashion to once again gather the energy to throw in two directions in the diagonal position. AUDIO-TONAL RHYTHM: Unlike pirouettes, the beauty of a series of fouettés is that once the rotative power is engaged, it is like a top which never stops. It is that continuous regenerative action which excites an audience, thus, it is important to be able to hear that “long grinding sound” (rrrrrrrrrrhhhhhhhhhhhuuuuummm, rrrrrrrrrrhhhhhhhhhhhuuuuummm, rrrrrrrrrrhhhhhhhhhhhuuuuummm) which is so descriptive of fouettés. There is a slight pause when the leg is in croisé and the body is in diagonal with the arms throwing energy in two directions. However, should you hear stop instead of the grind, your foot would simply stick out in croisé and the rhythm would be broken. ENDING THE SEQUENCE: To end a series of fouettés requires a totally different energy pattern from the one being used for continuous rotations. Since the balance is back and the accent is down, it takes a special technique which I call “cracking the whip” to pull the body together for the pirouette finish. The action used is a small motion forward then a sharp recoil back/front of the groin and shouldersEditorial correction. , End of Editorial correction. similar to the action of the hand when cracking a whipcord. To successfully apply this technique, the thought process must begin about two fouettés prior to the finish in order to zero in on the change of balance and convert the continuous flow of circular energy to the vertical/horizontal energy of the pirouette. INTEGRATING THE MOVEMENTS: To present a complete picture of the step, a clock-face is a wonderful visual aid because the action can actually be paced in time. Imagine for example, that you are going to be turning right and that your right leg is in croisé plié facing corner 2 (downstage left) or 10:30 on the clock face. Your shoulders are diagonally placed in alignment with the leg so that the audienceEditorial correction. , End of Editorial correction. which represents 12 o’clockEditorial correction. , End of Editorial correction. see the back of your spine. Your arms following the diagonal line are flicking energy in opposite directions. As the opening of the leg takes place, torque is released and the body begins its rotation. At the same time, the supporting leg is changing its balance point, the foot is rolling up, and at that moment when everything comes together in passéEditorial correction. , End of Editorial correction. it is 5 o’clock. Unlike the pirouette which fights to attain and sustain balance on the relevé position, fouettés are only on relevé until 7 o’clock when everything opens out on the diagonal again. In fouettés, you need only be on relevé or point for a small fraction of the time or ¼ of the clock face while ¾ is down. It is just a question of getting the rhythm going, rotating to the same point of balance each time and never missing a flick of the back hand. The right hand takes care of the centrifugal force and the left hand the centripetal or counterbalancing force which prevents traveling in the step. Something without which no turn is complete is the angle of spotting. In fouettés if the turn is done croisé, the spot is croisé until the pirouette finishes. At that time, the spot changes to the front.

Kneeland Turns Worksheet for Fouettés

Fouettés En Dehors
Fouettés En Dehors
Fouettés En Dedans
Fouettés En Dedans

ATTITUDE AND ARABESQUE EN TOURNANT

No classical repertoire is complete without a number of beautifully executed attitude and arabesque turns. However, there seems to be a great deal of confusion and misunderstanding in traditional training about the composition of these turns and just what makes them work. It has been my observation that failure to establish the proper balance point, improper use of the body and armsEditorial correction. , End of Editorial correction. as well as neglecting to apply the torque necessary for turning are the main culprits which can prevent the proper execution of these turns. I don’t wish to be redundant, but it can’t be emphasized enough that the use of good posture and the establishment of the correct balance point are always necessary parts of the basic start of any step and a crucial part of every rotation because of the variables involved. For example, whereas the balance point is directly over the supporting leg in a fouetté, it is considerably in front of the supporting leg in both attitude and arabesque turns and until the precise balance point is established for each turn, no successful rotation is possible. Likewise, no rotation will be possible if the application of torque is neglected. Both attitude and arabesque en tournant have traditionally been taught as an extension or a continuation of the pose. Consequently, these turns are attempted with the body in one piece at the same angle all stretched—hipbone aligned to shoulders—with no provision given to the application of turning power or torque. This method not only makes the turns more difficult than they need to be but detracts from their lyrical qualities and ensures a certain amount of failure. Another inhibitor of rotation is the incorrect use of the arms. It is of utmost importance to understand that the arm which will end up overhead will be required to do its work in a high place as close to the optimal position as possible, and if both arms are going to end up overhead, their work must be done on a high plane as well. Once the body has created rotative power, it is difficult for the arms to fight through that force to the overhead position. Moreover, any arm or hand action taken at or below the shoulder level after rotative power has been applied results in a “kinky” arm position which sabotages the turn. The single or double arm position is generally applied to attitude turns, but they may be used in arabesque as well. The traditional arms which are used for arabesque turns don’t play as large a role in the creation of rotative force as they do in the attitude turns. Nonetheless, it is important that they function at a high level also.

KINETIC ELEMENTS OF ATTITUDE TURNS EN DEHORS

NEUTRAL STATE AND PROPER POSTURE: As described in the section of Editorial correction. on End of Editorial correction. pirouettes, attitudes must also begin with the neutral state of the body and good posture with proper body alignment. ESTABLISHING THE BALANCE POINT: The principles are virtually the same for attitude en dehors as for attitude en dedans. INITIATING TORQUE: The “wringing-out of the body” principle is the same, but because an attitude turn en dehors is away from the supporting leg, the working leg cannot involuntarily join the rotative force or the spiraling action of the torso. Instead, it requires the added incentive of “pushing” against the floor to get the leg behind the spine for the turn. The feeling is one of kicking the leg around the body and turning around one’s spine. PROPER USE OF THE ARMS: Whereas the opening arm creates centrifugal force for rotation and the closing arm creates centripetal force for counterbalance in attitude turns en dedans, the opening arm in attitude turns en dehors must provide both functions. You should begin by sending the opening arm “outwards” from the body to its extremity, then reverse its action bringing it “upwards” toward the overhead position. As with attitude en dedans, the top of the wrist leads with the hand in “broken-wing” position, “flicking” to generate centripetal force for counterbalance. In the meantime, the closing broken-wrist action Text supplied by the editor. is End of supplied text. as for a pirouette. AUDIO-TONAL RHYTHM: ENDING THE STEP: INTEGRATING THE MOVEMENTS: Assuming that you are aware of your pointe Editorial correction. point End of Editorial correction. of balance and that you have “wrung-out” your body as far around the supporting leg as possible, you should “push” the foot off the floor as if to “kick it all the way around the body.” At the same time, your opening arm should “flick outwards” away from the body to create centrifugal force, after which it turns over—almost in a figure-eight feeling—and reverses itself, “cutting diagonally upwards” toward the overhead level in a broken-wing position. The hand “flicks inwards” toward the overhead position and “flick inwards” just as it did in attitude turn en dedans. Again, it should be emphasized that if you choose to use a two-arm port de bras, both arms must work at a high level out of the rotative force.
Attitudes En
                    Dehors
Attitudes En Dehors

KINETIC ELEMENTS OF ATTITUDE TURNS EN DEDANS

NEUTRAL STATE AND PROPER POSTURE: As described in the section on pirouettes, attitudes must also begin with the neutral state of the body and posture with proper body alignment. ESTABLISHING THE BALANCE POINT: As you begin the step, visualize exactly where your balance point will be, remembering to place it at a point far forward of the supporting leg. The exact point depends upon the length of your legs and torso. INITIATING THE TORQUE: Imagine that your body is a wet towel, which you are going to “wring out” over that point. The top half of the body will spiral toward the supporting leg in the opposite direction from the bottom half which has the pelvis “thrusting forward” over the balance point. The feeling is one of “wringing out the torso” as if the front of the closing shoulder will go around the body and meet the sole of the foot of the working leg. Obviously this can’t happen, but the opposing forces of the two parts of the body creates the torque necessary for the turn which is then ready to be released. PROPER USE OF THE ARMS: At the same time that the torque is being initiated, the opening arm and hand will be “flicking outwards” from the body creating centrifugal force or the energy for rotation, followed by the closing arm and hand which leading with the wrist “cuts the air diagonally upwards” and ends in the “broken wing” position above the head. Broken-wing is a coined term that describes the hand position which is turned away from the body with the palm bent inwards toward the inside of the wrist and literally looks like a broken wing until it “flicks inward” to provide counterbalance or centripetal force. AUDIO-TONAL RHYTHM: ENDING THE STEP: INTEGRATING THE MOVEMENTS: When the closing arm and hand have reached “optimal height” or the “the broken-wing” position and the top of the torso has rotated around the clock face as far as it will go while the bottom half or pelvis is pushing strongly over the balance point, the leg then joins the spiraling action taking its place behind the spine in the attitude position. It should be pointed out here that the leg is never placed in attitude. It is done for you by the spiraling action, which actually pulls the leg in behind the spine. At that moment when the leg joins the body, the closing hand “flicks inwards” creating the centripetal force necessary to counterbalance the centrifugal force previously generated by the opening hand, thus all the energies are brought with everything working together.
Attitudes En
                    Dedans
Attitudes En Dedans

ARABESQUE EN TOURNANT EN DEHORS

NEUTRAL STATE AND PROPER POSTURE: The principles are the same as for any other step or turn. ESTABLISHING THE BALANCE POINT: The principles used in an arabesque turn en dehors are the same as the ones used for attitude en dehors. INITIATING TORQUE: Like the attitude turn, there is the feeling of “getting around oneself backwards” or “kicking the leg around the body.” Once again, since the leg cannot voluntarily join the body during the rotation without the added incentive of friction of the foot pushing against the floor, there has to be a circular action backwards by the foot as if to push the wall back. This action occurs at the same time the torque is released from the body. PROPER USE OF THE ARMS: The arms may be used in a variety of ways such as was described in arabesque en dedans or in attitude en dehors or with both arms overhead. In each case, the principles described heretofore apply. AUDIO-TONAL RHYTHM: ENDING THE STEP: INTEGRATING THE MOVEMENTS: Since arabesque turns en dehors requires extra energy to turn away from the supporting leg, it will mean a sharp torque in the opposite direction while the pelvis is seeking the balance point and as the energy is released, the foot pushes in a circular manner away from the body as if it were a cat chasing its tail. The arms will be performing their function in whatever port de bras is chosen and as the supporting leg roles up into élèvé or relevé, everything should be working together. The leg has been kicked back of the spine, the torque has been released and the arms have done their job. It is important to impress on the student that the leg should never be placed because in most turns and particularly en dehors turns, it simply never reaches its destination which messes up the turn.
Arabesque En
                  Dehors
Arabesque En Dehors

ARABESQUE EN TOURNANT EN DEDANS

NEUTRAL STATE AND PROPER POSTURE: Like all other turns, arabesque turns en dedans begin with the neutral state of the body and good posture in proper alignment. ESTABLISHING THE BALANCE POINT: Similar to the attitude pose and turn, the balance point will be considerably forward of the supporting leg. It is important to visualize the approximate point before stepping or doing a relevé onto it. As a general rule it will be even further forward than for attitude because of the extended appendage in back. INITIATING THE TORQUE: As the preparatory step is taken, the pelvis presses forward seeking the proper balance point and the chest momentarily torques away from the supporting leg creating equal and opposite impetus for rotation. The torque automatically pulls the leg behind the spine. To attempt to “place” the leg in the proper arabesque position disturbs the timing of the turn as well as the balance point and, as a result, the leg rarely makes it to the position desired. PROPER USE OF THE ARMS: Unlike the attitude, fouetté, and pirouette rotationsEditorial correction. , End of Editorial correction. the arms have much less to do. They must work at a high level with the release built in and as the torque of back and shoulders is released, the arms with the hands and facing the floor will cut the air. AUDIO-TONAL RHYTHM: ENDING THE STEP: INTEGRATING THE MOVEMENT: Using the neutral position and good posture with proper body alignment, create the torque as a part of the step onto the balance point. This means that the body will torque slightly away from the supporting leg and the direction of the turn. With the power created, the back and shoulders will release the torque. At the same time, the arms with their built-in release and with hands flat will slice the air. The leg automatically joins behind the spine as a result of the power of torque and body rotation.
Arabesque En
                  Dedans
Arabesque En Dedans

À LA SECONDE EN TOURNANT

One of the greatest barriers in any open turn is the fact that most dancers and teachers look at the effect or see the picture they want to make and then try to place the leg in that picture rather than realizing that the torque of the body and the other “kinetic” concepts presented in this discourse will make it happen. This is particularly true for turns in second position because of the lag between the torque of the body and the time needed before the leg actually arrives at its final position for the turn. It takes courage and faith to believe that the leg is going to catch up to the body and assume the proper position. As a result, the normal inclination of every dancer is to want to get it there as soon as possible which throws the leg out of the control zone and most like Editorial correction. likely End of Editorial correction. aborts the turn. A wonderful exercise to achieve the proper leg position is a recoiling technique of the working foot against the floor. As the torque of the ribs is released and the rotation begins, the foot creates a backward-push-and-around action as if it were going to scrape all the walls of its journey to join the body. This action can only be done if the dancer is at the proper level of energy and height of the body weight, which allows the use of downward pressure in order to create the necessary friction against the floor. Although the preparatory positions and the direction of the turns differ in à la seconde en dedans and en dehors, these turns share the common problem of how to get the leg into a controlled second position. For both, it is a question of “fine turning” the combination of “wring-out-the-towel” action of the torso and ribs, the reactive forces of the arms, the realignment of body parts over the balance point and the recoiling technique used by the working foot against the floor which creates the power to bring the leg around into the proper à la seconde control-zone position.

À LA SECONDE EN TOURNANT EN DEHORS

NEUTRAL STATE AND PROPER POSTURE: The principles are the same as for any other step or turn. ESTABLISHING THE BALANCE POINT: In starting à la seconde turns from the 4th position preparation, it is important to note that the feet do not carry equal weight. The weight is actually centered over the front foot, which will become the supporting leg for the turn so that the back foot will be free to help initiate the torque. During the turn, the body weight will be outside and slightly forward of the supporting leg. INITIATING THE TORQUE: The biggest problem facing the dancer who plans to execute an à la seconde turn en dehors is how to generate enough “turn power” to get the working leg into a controlled second position so that the turn can take place. If the preparation is from 4th position as described above, rotative power may be initiated in two ways. It can begin as a “scoot” (a little turn-around-torquing action) which is a combined effort of the working foot and ribs to get the working leg into a controlled second position.Editorial correction. ) End of Editorial correction. It should be made clear that a “scoot” is not a plié because it must be done at a high level of energy and continue at that same level and height throughout the initial movement. This same function can be accomplished without the scoot by pushing straight from 4th position, but the action must be much stronger. It requires a release of an energy level high enough to permit a thrust downwards, which reverses itself upwards through the body, and when combined with torque creates the necessary power to get the working leg into position for the turn. It is important to remember that the leg cannot be placed but arrives at its position because of the rotative action used. Moreover, after the initial rotative power is established, a series of à la seconde turns is possible only if the ribs continue a slight torquing action along with a slight collapse and stretch action of the wrists. PROPER USE OF THE ARMS: Regardless of the style of port de bras used, the opening arm will flick into centrifugal force and the closing arm into centripetal force as with most turns. AUDIO-TONAL RHYTHM: ENDING THE STEP: In the à la seconde turn, the weight placement is beyond and slightly front of the supporting leg and when the step is ready to be finished, the extended appendage must be brought into the passé position for the final rotation. This requires a “crack-the-whip” action of the shoulder and the groin of the working side which brings the energy inward so as to create the vertical and horizontal counterforce to finish the turn. INTEGRATING THE MOVEMENTS: Using the principles regarding the neutral state, proper posture and establishment of the balance point, the major problem is how to get the leg into a controlled second position for an en dehors turn. Since the leg should not be placed into position, the scoot and the recoiling action of the working foot against the floor combined with a torque of the ribs is a good way to “key into” the rotative power generated. A similar action can also be straight from 4th position without a scoot. However, the important thing to remember about a turn in second position is that to be successful, it must be a combination of a wringing-out action of torso and ribs, the use of the reactive forces of the arms, the realignment of body parts over the balance point and the recoiling technique of the foot. If all these things are done along with proper spotting and the rhythm, the leg becomes a part of the sequential order of events and need never be a source of worry.
À la Seconde
                  En Dehors
À la Seconde En Dehors
À la Seconde
                  En dedans
À la Seconde En dedans

KINETIC VOCABULARY

AUDIO-TONAL RHYTHM: The personal tempo or duration of a movement or series of movements that is felt and heard internally by the physical, intellectual and emotional systems of the body regardless of the music being played. BALANCE POINTE: That point on the ground to which a body in the correct postural position should relate in order to be able to rise and lower without any loss of equilibrium. CENTRIFUGAL FORCE: Tending to move away from the center of a revolving body. CENTRIPETAL FORCE: Tending to move toward the center of a revolving body. CIRCULAR ENERGY: A continuous flow of energy sent in a circular pattern in a particular direction, e.g. front, back, up or down. CONTROL ZONE: That point in which optimum turnout of the legs or placement of the arms can be used in open positions without losing strength, balanced equilibrium or distorting correct posture. COUNTERBALANCE: To oppose with equal weight, energy or influence. COUNTERFORCE: Resistance of energy in two directions – vertically and horizontally. CRACK THE WHIP: A sharp movement of the shoulder, rib cage and pelvis in order to change from an open position to a closed (or passé) position as seen in à la seconde turns or a series of continuous fouettes ending in pirouettes. CUSHIONING: The contribution of all the joints in the body to efficiently execute a soft landing, particularly when ending a sequence of steps. DOWNWARD ENERGY: The energy within a body which flows in the same line as the flow of gravity and which must be engaged for purposes of thrusting, jumping and turning. ENERGY: An inherent power and the capacity for physical action. EQUILIBRIUM: A state of balance between two opposing forces. FIGURE EIGHT: A body pattern described by the rib cage and/or arms and legs sent out in a circular pattern along a horizontal line and resembling a figure eight inverted and lying on its side. FISHHOOK OF ENERGY: Energy sent in two different directions in a circular pattern with the body’s impetus being concentrated downward on the inside and lower part of both circles creating a “fishhook” image. GRAVITY: The attraction of bodies toward the center of the earth. HORIZONTAL ENERGY: Energy which is parallel to the plane of the horizon, flat, even, level and not vertical. INERTIA: A state whereby matter remains at rest or continues in uniform motion unless acted upon by some outside force, matter which is powerless to change or to move itself. KINESIOLOGY: The science dealing with the interrelationship of the physiological processes and anatomy of the human body with respect to movement (the science of the body in motion). KINETIC ENERGY: Energy which is stored in the body awaiting use (of or relating to the motion of material bodies and the forces and energy associated therewith). NEUTRAL STATE OF THE BODY: A state applicable to any body position with stored potential energy for movement in any direction. In preparatory positions, the body should feel alert, aware, anticipating and “ready to go” when given the proper impetus – the opposite of “pulling-up” and isolating the rib cage or tensing and gripping the muscles. OVER-UNDER/UNDER-OVER MOVEMENT PATTERNS: An undulating, circular pattern of energy felt internally and working in line with the theory of “equal and opposite” reactions to influence the path and quality of steps. PROPER BODY ALIGNMENT: Stress-free placement of all parts of the body including muscles, ligaments, tendons, joints, tissues and bones in perfect position in relation to their adjacent or adjoining part or parts to form the body positions required by the art. RECOIL: To bounce or spring back, a rebounding from impact (such as from the floor in jumping or thrusting). RELEASE: The “miniature” circular, upward action just prior to any movement that makes it possible to thrust against the floor to propel the body or body parts in some direction, freeing it from inertia. ROTATIVE FORCE: A combination of centrifugal and centripetal forces spiraling around a center or axis. SCOOT: A sharp foot movement to be used as an impetus in which the level of energy remains the same and does not lower into a plié. Scoots occur particularly in the basic Mazurka step or consecutive à la seconde turns en dehors (usually termed “Tours Pour La Cavalier”). SPOTTING: A visual device used by dancers in turning whereby the head is the last to leave but the first to return in each rotation and with the eyes looking at the identical spot each time. STRAIGHT-LINE MOVEMENT: The isolation and shortening of a movement by cessation of energy flow which has to be reactivated as opposed to movements using circular patterns which have continuity. THEORY OF OPPOSITION (CAUSE AND EFFECT): For every action, there is an “equal and opposite” reaction, for every cause, an effect. TORQUE: A measured degree of a spiraling or circular movement of the rib cage in one direction to give impetus to produce rotation in the opposite direction, a preparatory movement of all turns. TORSION: The twisting of a body by two equal and opposite torques (an act of twisting or wringing). VERTICAL ENERGY: Energy which rises perpendicularly from a level surface, a whirlpool or spiral to the top of the head (vertex), upright, straight up and down and not at an angle or horizontal. VORTEX OF ENERGY: The whirling motion of the body spiraling into itself. WEIGHT LEVEL VARIABLES: The differing amounts of body weight placed up the feet necessary for proper posture, alignment of the body and execution of steps – always a fraction above the floor.

Pirouette Clock Kneeland Method

Description not provided.
This athlete’s name is Richard “Dick” Fosbury. See Bar-Eli, Michael, et al. "Tsukahara's vault and Fosbury's flop: A comparative analysis of two great inventions." International Journal of Innovation Management 12.01 (2008): 21-39. This athlete’s name is Richard “Dick” Fosbury. See Bar-Eli, Michael, et al. "Tsukahara's vault and Fosbury's flop: A comparative analysis of two great inventions." International Journal of Innovation Management 12.01 (2008): 21-39. Lydia Joel refers to this in her section of the article written with Jo Anna Kneeland for the March 1966 issue of Dance Magazine, “A Dancer Prepares,” p. 50. Here, the editor assumes that in this context of “perfect” the author means perfect for the individual’s body, or as perfect as their body allows them to be. To break, in this sense, means a soft flexion of the wrists to return to en bas. A parabola is a U-shaped curve with an extreme point called a vertex which may occur at the top or bottom of the curve. Lydia Joel and Jo Anna Kneeland, “A Dancer Prepares,” Dance Magazine (March 1966), 50. In this article, Jo Anna’s work with Dr. Murray Sanders is referred to. He was active at Florida Atlantic University, and prior to that, at the University of Miami. See facsimile of the clock in the appendix. Some text here was accidentally typed twice. Enable original errors in the display options to see it. This editorial emendation introduces the symbol for "less than" that is missing in the original and normalizes the nested parenthetical to square brackets. Left unfinished by Jo Anna Kneeland. Left unfinished by Jo Anna Kneeland. Left unfinished by Jo Anna Kneeland. Left unfinished by Jo Anna Kneeland. Left unfinished by Jo Anna Kneeland. Left unfinished by Jo Anna Kneeland. Left unfinished by Jo Anna Kneeland. Kneeland included images of clocks to help dancers metaphorically “clock” themselves while executing turns, as if their body is at the center and their appendages are the arms of the clock. Left unfinished by Jo Anna Kneeland. Left unfinished by Jo Anna Kneeland.

Glossary of Ballet Terms

This glossary is not meant to be comprehensive of ballet terminology, but only to define the words used by Kneeland in The Amazing Kneeland Methodology. The Concise Oxford Dictionary of Ballet, published by Oxford University Press (1977), was consulted in the creation of this glossary. À la seconde "to the side" or "in the second position," referring to movements where the leg or body is extended to the side, parallel to the dancer's shoulders. Adagio an exercise in a traditional ballet class, done both at barre and on the floor, that features slow, controlled movements. Arabesque A fundamental ballet position in which the body is in profile, supported on one leg, with the other leg extended backward at a 90° angle. Arabesque derrière the leg extension is to the back. Arch refers to the arch of the foot, which is genetic, but ballet dancers work to strengthen the articulation of the foot to arrive at the desired appearance. Arm positions there are two basic arm positions in ballet: fingers touching to form an oval shape; or arms extended. However, the various ballet methods (Vaganova, Cecchetti, etc.) teach other positions beyond these two. Attitude a position based on the Bologna statue of Mercury, codified by Blasis, in which the body is supported on one leg, the other knee held higher than the foot at a 90° angle. Balançoire swinging the working leg between front (devant) and back (derrière), usually used with various ballet formations. Barre the wooden bar, fastened to the wall of a dance studio, that dancers use to stabilize their balance during exercises during initial exercises in class. Battement a beating action of the leg; single or repeated movement with leg extended. Battement tendu side-to-side movement of the working (non-supporting) leg, where only the toes touch the floor (tendu à terre) or the foot remains in the air (tendu en l'air). Corps dancer the group members of a ballet company; not soloists. Cou de pied in classical ballet, a position in which the working foot is pointed and resting on the lower part of the supporting leg (above the ankle bone but below the calf). This position serves as a base for jumps, turns, and intricate foot work. Croisé a position in which one leg crosses in front of or behind the other, creating a crossed appearance of the dancer's body from the audience's view. Croisé plié combines a plié (bending at the knees) with the croisé position. Dégagé part of the (initiating) execution of jumps Demi French prefix meaning "half," used to modify other ballet terms. For example, demi-plié means a "half bend" of the knees with the heels remaining on the floor. Another example is demi-pointe, which refers to a position on the balls of the feet, not fully rising to on toes. Développé the unfolding of a working leg into an open position in the air, where it is held steadily. Développé à la seconde the unfolding of a working leg into second position, where it is held steadily. Développé à la quatrième devant the unfolding of a working leg into fourth position, with the leg in front. Développé à la quatrième derrière the unfolding of a working leg into fourth position, with the leg behind. Élevé Rising to pointe or demi-pointe (to the toes) from straight legs and flat feet. En avant a movement to the front. En bas low or down (usually refers to arms). En dedans toward the inside, or turning inward. En dehors toward the outside, or turning outward. En haut high or raised (usually refers to arms). En l’air a ballet movement performed off the ground; often used to describe the working leg making movements in the air or off the ground. En tournant while turning. Extension the act of stretching the leg to its full length in a fluid movement. Five Positions of the Feet the five basic positions of the feet in classical ballet. First Position Second Position Third Position Fourth Position Fifth Position First position the feet aim to form a straight line, heels touching, toes extended to right and left.
A ballet dancer demonstrating First Position. By Richwales - Own work, CC BY-SA 4.0, Link to
              original.
A ballet dancer demonstrating First Position. By Richwales - Own work, CC BY-SA 4.0, Link to original.
Second position the feet are in a straight line with toes extended to right and left, but the heels are a step apart.
A ballet dancer demonstrating Second Position. By Richwales - Own work, CC BY-SA 4.0, Link to
              original.
A ballet dancer demonstrating Second Position. By Richwales - Own work, CC BY-SA 4.0, Link to original.
Third position the feet are placed one in front of the other, parallel to each other, the heel of the front foot resting against the hollow of the instep of the back foot, toes pointing outward.
A ballet dancer demonstrating Third Position. By Richwales - Own work, CC BY-SA 4.0, Link to
              original.
A ballet dancer demonstrating Third Position. By Richwales - Own work, CC BY-SA 4.0, Link to original.
Fourth position like third position, only with the distance of a step (of varying length) between the feet. In ouverte or open fourth position, the heels are lined up. In croise or closed fourth position, each heel aligns with the toe of the opposite foot.
A ballet dancer demonstrating Open Fourth Position.
            By Richwales - Own work,
              CC BY-SA 4.0, Link to
              original.
A ballet dancer demonstrating Open Fourth Position. By Richwales - Own work, CC BY-SA 4.0, Link to original.
A ballet dancer demonstrating Closed Fourth Position. By Richwales - Own work, CC BY-SA 4.0, Link to
              original.
A ballet dancer demonstrating Closed Fourth Position. By Richwales - Own work, CC BY-SA 4.0, Link to original.
Fifth position the feet are turned outward, one foot immediately in front of and touching the other.
A ballet dancer demonstrating Fifth Position. By Richwales - Own work, CC BY-SA 4.0, Link to
              original.
A ballet dancer demonstrating Fifth Position. By Richwales - Own work, CC BY-SA 4.0, Link to original.
Flexed foot the opposite of pointing; the toes and top of the foot are drawn up and back toward the leg. Fondu lowering of the body using the supporting leg. Fouetté or fouette "whipped;" a quick pivot on the supporting leg changes the orientation of the body and the working leg. Fouetté rond de jambe en tournant the working leg extends forward and then whips around to the side as the working foot is retracted to the supporting knee, creating the impetus to rotate one turn.
A ballet dancer demonstrating fouetté en tournant. Public Domain. Link to
              original.
A ballet dancer demonstrating fouetté en tournant. Public Domain. Link to original.
Frappé action of extending or striking the working foot out from cou de pied. Grand battement a movement in which both legs are kept straight and one leg is kicked outward from the body and in again. Open positions movements or stances in which the legs are not crossed or touching. Passé working knee passes by the knee of the supporting leg. Passé relevé holding the passe position while elevated on the ball of the foot or toes. Petit battement normally done at the barre, the dancer swiftly moves his/her leg in front then behind their calf. Pirouette A non-traveling turn on one leg. Plié a bending of the knees outward with the upper body held upright. Pointe, pointes on tip toes. Port de bras movement of the arms. Relevé(s) rising onto the balls (demi-pointe) or toes (pointe) of one or both feet. Relevé-passé dancer performs a relevé (rising onto the balls of the feet) while also bringing the working leg to the passé (toe to the side of the knee). Rond de jambe pointing the toes of one foot and making a half circle movement Rond de jambe en l’air rond de jambe with the lower part of the leg while it is off the ground. Rond de jambe à terre rond de jambe with the pointed toe remaining on the floor or ground. Soft landing a landing technique in which the impact of a jump is absorbed gradually from the ball of the foot to the heel while bending the knees and ankles. Tendu pointing movement, where the leg stretches out and then returns to position. Tendu à la seconde tendu, done with the feet in second position. Turnout feet at right angles from a forward-facing line.